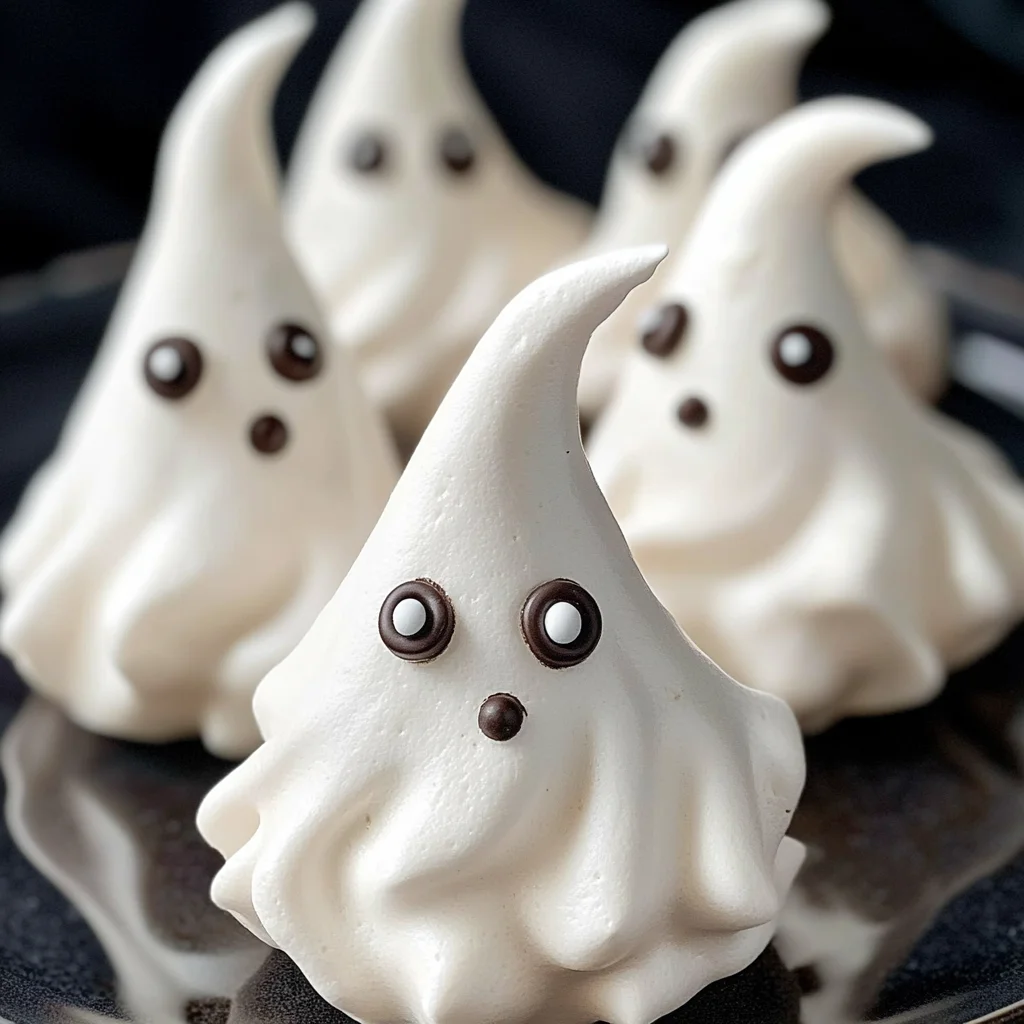
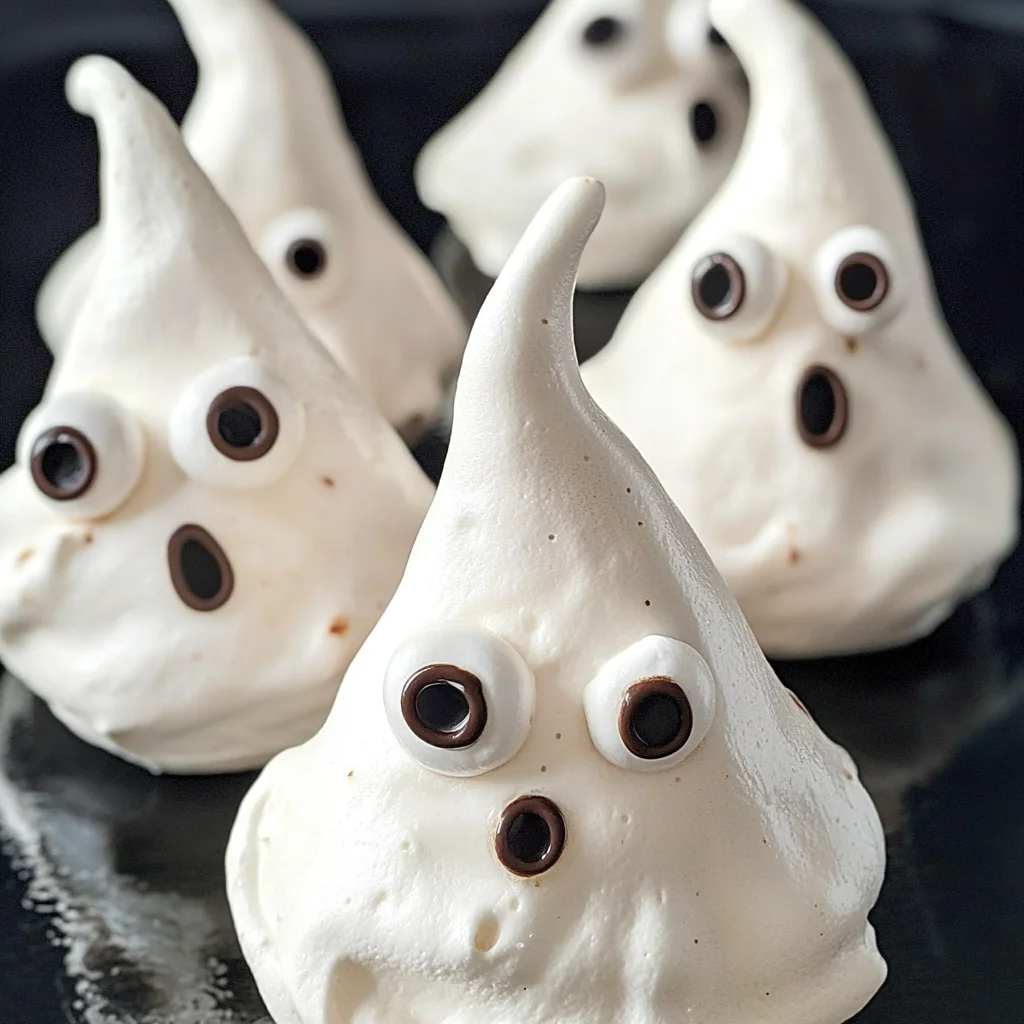
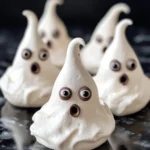
Meringue Ghosts
If you’re looking for a fun and adorable treat that’s perfect for Halloween, you’ve come to the right place! These Meringue Ghosts are not only cute but also incredibly simple to make. They are light, airy, and have a delightful sweetness that everyone will love. I often whip up a batch of these little spirits for family gatherings or just to enjoy as an afternoon snack with my loved ones. Trust me, they vanish faster than you can say Boo!
The best part? You can make these charming meringue treats ahead of time and store them for up to two weeks. They’re sure to bring smiles to faces young and old alike!
Why You’ll Love This Recipe
- Easy to Make: With just a few simple steps, you’ll have a batch of delightful ghosts ready to impress!
- Kid-Friendly Fun: These meringues are perfect for involving the kids in the kitchen—let them help pipe and decorate!
- Versatile Decoration: Get creative with the eyes and mouths; you can use different candies for unique expressions.
- Make Ahead: Prepare them in advance and store them away for parties or unexpected guests.
Ingredients You’ll Need
These Meringue Ghosts use simple, wholesome ingredients that you likely already have on hand. Here’s what you’ll need:
- 2 large egg whites
- 1/4 teaspoon cream of tartar
- ½ cup granulated sugar
- ½ teaspoon pure vanilla extract
- candy eyeballs and/or mini chocolate chips
Variations
Feel free to get creative with this recipe! Here are some fun variations to consider:
- Add Food Coloring: Give your ghosts a spookier touch by adding a drop or two of food coloring before piping.
- Try Different Toppings: Use colored sprinkles or edible glitter instead of candy eyes for a festive flair.
- Change the Flavor: Experiment with almond or lemon extract instead of vanilla for a unique twist.
- Make Ghostly Shapes: Instead of traditional ghost shapes, try piping different spooky figures like bats or pumpkins!
How to Make Meringue Ghosts
Step 1: Preheat the Oven
First things first, preheat your oven to 275°F (135°C). This low temperature is key in making sure your meringues dry out properly without browning. Line two baking sheets with parchment paper or Silpat mats—this will prevent sticking and make cleanup a breeze.
Step 2: Whip the Egg Whites
In a metal or glass bowl (a stand mixer works wonderfully here), add the egg whites. Beat them at medium-low speed until they’re frothy—this usually takes about 30 seconds. It’s important not to use plastic bowls here since they might contain grease that can affect the meringue’s texture.
Step 3: Add Cream of Tartar
Once your egg whites are frothy, it’s time to add the cream of tartar. This ingredient helps stabilize your meringue, ensuring it holds its shape beautifully when piped out.
Step 4: Gradually Add Sugar
Now comes the fun part! Gradually add the granulated sugar one tablespoon at a time while continuing to beat at medium-low speed. Patience is key here; this process should take around 1-2 minutes. If you rush it, your meringue may end up grainy!
Step 5: Beat Until Stiff Peaks Form
After all the sugar is incorporated, turn up the mixer speed to medium. Beat until stiff peaks form and your meringue shines—it should take about three minutes. Don’t forget to check if it feels gritty by rubbing a bit between your fingers; if it does, keep beating until smooth.
Step 6: Add Vanilla Extract
Gently mix in the vanilla extract until just combined. This adds a lovely flavor that perfectly complements the sweetness of your ghosts.
Step 7: Prepare Your Piping Bag
Transfer your lovely meringue mixture into a large piping bag fitted with a 1/2” tip. A handy trick is to place the bag in a tall glass while filling it; this prevents messes and makes it easier to fill.
Step 8: Secure Your Parchment Paper
To keep your parchment paper from sliding around while you’re piping, place small dollops of meringue under each corner.
Step 9: Pipe Your Ghosts
Hold your piping bag perpendicular to the lined baking sheet and gently press down using even pressure. Start with about a 1-inch mound for smaller ghosts and make some larger ones too! Varying their shapes keeps things interesting—just remember to leave at least 2 inches between each ghost.
Step 10: Add Eyes and Mouths
Time for some personality! Stick candy eyes onto each ghost and use mini chocolate chips for their mouths—make sure you insert them pointy side down so they look just right!
Step 11: Bake Them Up
Now it’s time for these little spirits to bake! Place them in the preheated oven for about one hour until they’re dry and crisp. A crucial tip: don’t open that oven door after baking! Turn off the oven instead and let them cool inside for about one to two hours.
Step 12: Store Your Ghosts
Once cooled completely, transfer your adorable ghosts into an airtight container where they’ll stay fresh at room temperature for up to two weeks. Just remember not to refrigerate them; moisture is their enemy!
And there you have it! A delightful treat that’s perfect for Halloween gatherings or simply as sweet bites throughout October. Enjoy making these Meringue Ghosts—they’re sure to become a favorite!
Pro Tips for Making Meringue Ghosts
Making meringue ghosts can be a fun and rewarding experience, especially with these handy tips to ensure your treats turn out perfect!
- Use fresh egg whites – Fresh egg whites whip up better and create a more stable meringue. If your eggs are older, the meringue may not rise as effectively.
- Avoid any grease – Ensure all your equipment is squeaky clean. Any trace of grease can hinder the egg whites from whipping to their full potential, leading to flat meringues.
- Be patient with sugar – Gradually adding sugar is crucial for achieving a smooth texture. This slow incorporation allows for better absorption and helps create that glossy finish we all love in meringues.
- Don’t rush the cooling process – Letting your meringues cool in the oven prevents sudden temperature changes that could cause them to crack. It also allows them to dry out thoroughly, enhancing their crispiness.
- Store properly – Keeping your meringue ghosts in an airtight container ensures they stay fresh and crispy. Avoiding humidity is key; moisture can quickly ruin their delightful crunch.
How to Serve Meringue Ghosts
Meringue ghosts not only taste delightful but also make a charming presentation at any gathering, especially during Halloween! Here are some ideas on how to beautifully present these spooky sweets.
Garnishes
- Chocolate drizzle – A light drizzle of melted dark or white chocolate adds an extra layer of sweetness and makes them visually appealing.
- Sprinkles – Add some festive sprinkles around the meringue ghosts for added color and fun, which can brighten up any dessert table.
- Edible glitter – For a magical touch, sprinkle some edible glitter over the ghosts. It enhances the look and makes them feel even more special!
Side Dishes
- Pumpkin spice cupcakes – These moist cupcakes topped with cream cheese frosting provide a delicious contrast to the lightness of meringues, making them perfect for fall celebrations.
- Apple cider donuts – Soft, spiced donuts complement the airy texture of the meringue ghosts while adding a seasonal flavor that everyone will love.
- Chocolate mousse – Rich and creamy chocolate mousse pairs wonderfully as it contrasts with the lightness of the meringues while offering a decadent indulgence on your dessert platter.
- Fruit salad – A refreshing fruit salad balances out the sweetness of the meringues, providing a lighter note that’s perfect for cleansing the palate.
With these tips and serving suggestions, your Meringue Ghosts will not only be spook-tacular but also an enchanting addition to any dessert spread!
Make Ahead and Storage
These Meringue Ghosts are not only a delightful treat to make, but they also shine in meal prep! Whether you’re planning for a Halloween party or just want to enjoy a spooky snack throughout the week, these ghosts can be made ahead of time and stored without losing their charm.
Storing Leftovers
- Keep your meringue ghosts in an airtight container at room temperature.
- Ensure they are completely cool before sealing them to maintain their crisp texture.
- They can last up to 2 weeks if stored properly in a dry place.
Freezing
- While freezing is not recommended for meringues due to their delicate nature, if you must, ensure they are well-sealed in an airtight container or freezer bag.
- To thaw, leave them at room temperature for a few hours. However, expect some change in texture.
Reheating
- Meringue ghosts do not need reheating as they are best enjoyed at room temperature.
- If they lose their crispness (due to humidity), you can place them back in the oven at a low temperature (around 200°F or 93°C) for a few minutes to restore some crunch.
FAQs
Here are some common questions about making Meringue Ghosts that might help you out!
Can I use different flavorings for my Meringue Ghosts?
Absolutely! While pure vanilla extract is traditional, you can experiment with other flavorings such as almond or lemon extract for a unique twist.
How do I prevent my Meringue Ghosts from cracking?
To minimize cracks, make sure you’re beating the egg whites properly without overmixing. Also, avoid opening the oven door too soon while baking; let them cool inside the oven after baking for best results.
What can I use instead of candy eyeballs on my Meringue Ghosts?
If you don’t have candy eyeballs on hand, mini chocolate chips work wonderfully too! You can even use small pieces of fruit leather or colored frosting if you’re feeling creative.
How long will my Meringue Ghosts stay fresh?
When stored correctly in an airtight container at room temperature, your Meringue Ghosts will stay fresh for up to two weeks—if they last that long!
What is the secret to making perfect Meringue Ghosts?
The key is in the egg whites! Ensure they are free from any grease and that you beat them until stiff peaks form. Adding sugar gradually is also crucial for achieving that perfect glossy finish.
Final Thoughts
I hope you have as much fun making these adorable Meringue Ghosts as I did! They’re not just delicious; they’re a delightful addition to any festive gathering and sure to bring smiles. Enjoy the process of creating your spooky treats and feel free to experiment with different shapes and flavors. Happy baking, and may your kitchen be filled with joy and laughter!
Meringue Ghosts
Create fun and delicious Meringue Ghosts for your next celebration! Perfectly sweet and spooky—give this recipe a try today!
- Prep Time: 20 minutes
- Cook Time: 60 minutes
- Total Time: 1 hour 20 minutes
- Yield: Approximately 24 ghosts 1x
- Category: Dessert
- Method: Baking
- Cuisine: American
Ingredients
- 2 large egg whites
- 1/4 teaspoon cream of tartar
- ½ cup granulated sugar
- ½ teaspoon pure vanilla extract
- Candy eyeballs or mini chocolate chips for decoration
Instructions
- Preheat your oven to 275°F (135°C). Line two baking sheets with parchment paper.
- In a clean bowl, whip egg whites on medium-low speed until frothy. Add cream of tartar and continue whipping.
- Gradually add sugar one tablespoon at a time while mixing until stiff peaks form.
- Gently fold in vanilla extract.
- Transfer the mixture to a piping bag and pipe ghost shapes onto the baking sheets.
- Decorate with candy eyes or chocolate chips.
- Bake for about one hour until dry, then let cool in the oven.
Nutrition
- Serving Size: 1 ghost (15g)
- Calories: 60
- Sugar: 14g
- Sodium: 0mg
- Fat: 0g
- Saturated Fat: 0g
- Unsaturated Fat: 0g
- Trans Fat: 0g
- Carbohydrates: 15g
- Fiber: 0g
- Protein: 0g
- Cholesterol: 0mg