Halloween Pudding Cups
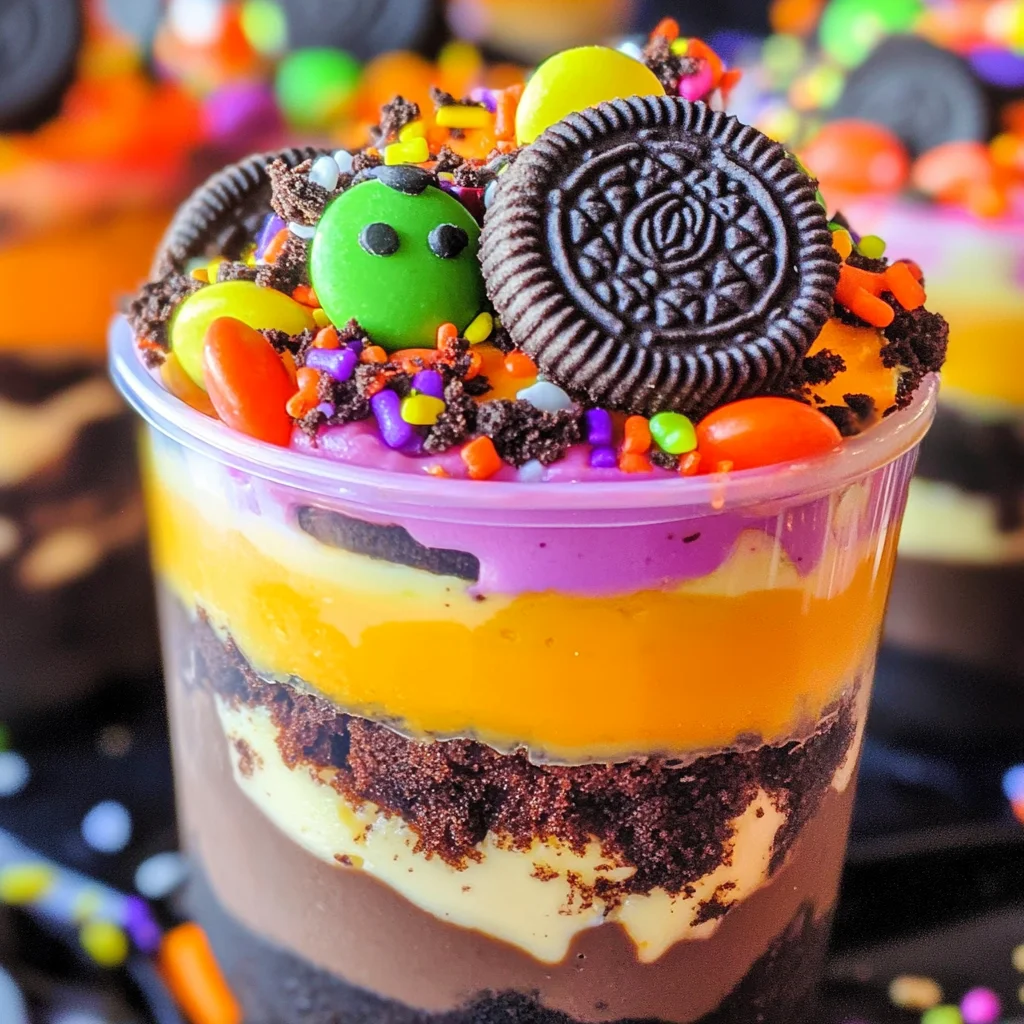
If you’re looking for a delightful and spooky treat to celebrate Halloween, look no further than these Halloween Pudding Cups! This fun twist on the classic dirt cup recipe is perfect for parties, family gatherings, or even just a cozy night in with loved ones. I love how easy it is to bring a little festive flair to dessert without spending hours in the kitchen. The colorful layers of pudding, crumbled Oreos, and cake make this treat not just delicious but also visually appealing!
These cups are sure to be a hit with kids and adults alike! There’s something magical about digging into a layered dessert that combines chocolatey goodness with creamy sweetness. Plus, they’re super simple to make, which is always a win in my book!
Why You’ll Love This Recipe
- Easy to Make: With just a few steps, you can whip up these festive cups without any fuss.
- Family-Friendly Fun: Kids will love helping layer the pudding and crumble the cookies—it’s like crafting in the kitchen!
- Perfect for Any Occasion: Whether it’s a Halloween bash or just an ordinary day that needs some cheer, these treats fit right in.
- Make-Ahead Convenience: Prep these cups ahead of time and let them chill until you’re ready to serve, saving you stress on busy days.
Ingredients You’ll Need
Gathering ingredients for these Halloween Pudding Cups is a breeze! They are all simple and wholesome, making it easy to create this festive treat. Here’s what you’ll need:
For the Cake Layer
- 1 15.25 ounce box devils food cake
- Water (oil and eggs as called for on the box)
For the Pudding Layers
- 2 3.4 ounce boxes white chocolate instant pudding
- 4 cups cold milk
- 8 ounces whipped topping
- Neon green (as well as orange and purple food coloring)
For Toppings
- 1 ½ cups crushed Oreo cookies
- Milano cookies
- Halloween candy and sprinkles for decor
- 10 8 ounce clear buckets
Variations
This recipe is wonderfully flexible! You can easily switch things up based on what you have at home or your taste preferences. Here are some fun ideas:
- Switch Up the Flavors: Use different flavors of instant pudding—vanilla or chocolate can add new twists!
- Add Fresh Fruit: Layer in some chopped strawberries or banana slices for added freshness.
- Try Different Cookies: Instead of Oreos, experiment with other cookie types for unique flavors.
- Change Up the Colors: Get creative with food coloring! Mix colors for a fun marbled effect.
How to Make Halloween Pudding Cups
Step 1: Bake the Cake
Preheat your oven to 350 degrees and prep your baking dish. Baking the cake is essential because it serves as the base layer of our pudding cups. Follow the instructions on your devil’s food cake mix box using water, oil, and eggs as directed. Once baked, let it cool completely before cutting it into bite-sized squares.
Step 2: Prepare the Pudding
While your cake cools, let’s make the pudding! In a large bowl, combine the white chocolate pudding mix with cold milk. Mixing until thickened is key here; this gives us that creamy texture we love. Once it’s thickened nicely, divide it into three bowls and add your vibrant food coloring.
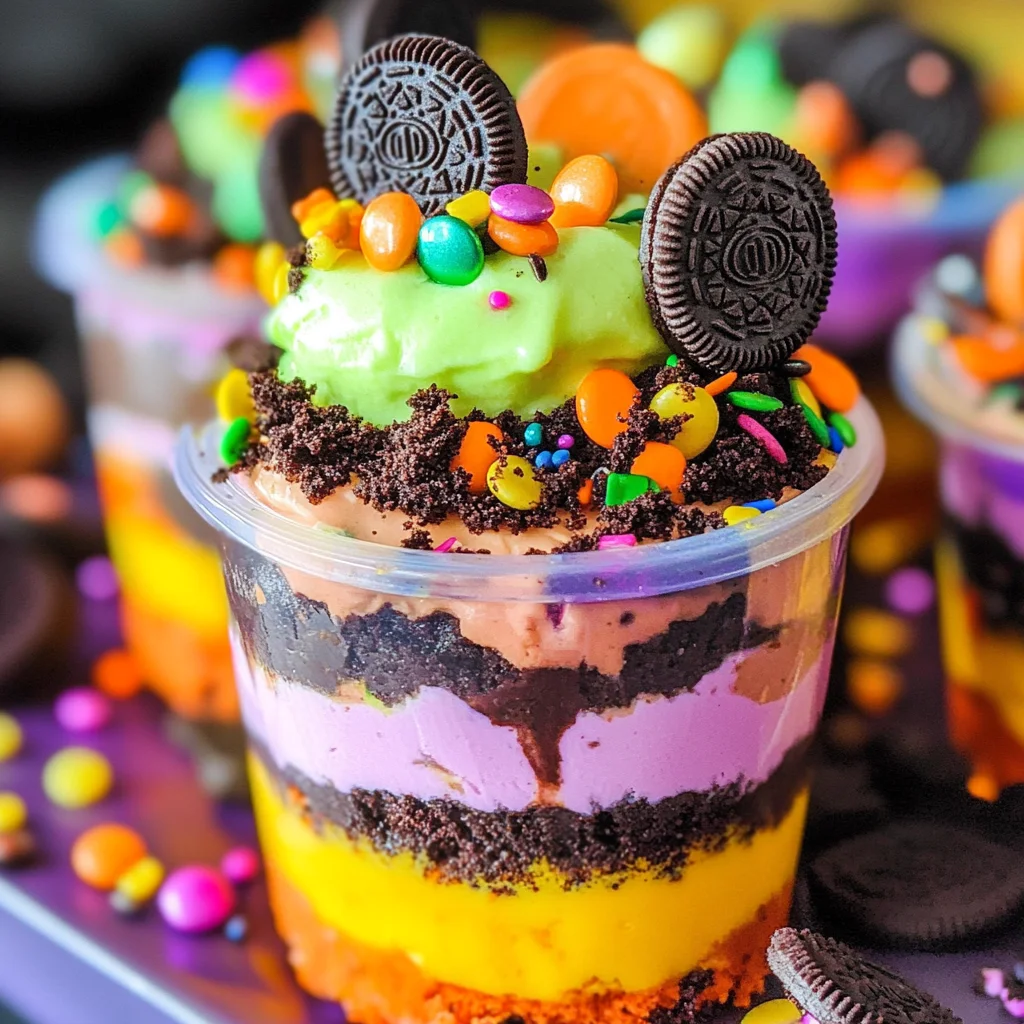
Step 3: Layer It Up!
Now comes the fun part—layering! Grab those clear buckets and start with a layer of cake cubes at the bottom. Next, add a layer of one color of pudding followed by crumbled Oreos. Repeat this process until each cup is filled beautifully, finishing off with whipped topping and decorations like Milano cookies or Halloween candy.
And there you have it—your spooky yet scrumptious Halloween Pudding Cups are ready to impress! Enjoy every bite as you dig into this layered delight that’s perfect for celebrating all things Halloween!
Pro Tips for Making Halloween Pudding Cups
Creating these delightful Halloween Pudding Cups is a breeze when you follow these handy tips!
-
Use Room Temperature Ingredients: Make sure your milk and eggs are at room temperature for smoother mixing, which results in a creamier pudding texture.
-
Crush Cookies Evenly: When crushing your Oreo cookies, aim for a mix of fine crumbs and slightly larger pieces. This adds texture to your cups and creates an appealing layered look.
-
Experiment with Colors: Feel free to mix different shades of food coloring! Experimenting with colors can make your pudding cups even more festive and fun.
-
Chill Before Serving: Let the assembled cups chill in the refrigerator for at least two hours before serving. This helps the flavors meld together and makes the dessert extra refreshing.
-
Involve Kids in Decorating: Allow the little ones to help decorate with Halloween candies and sprinkles. It turns dessert-making into a fun family activity, making it even more special!
How to Serve Halloween Pudding Cups
Presentation is key when it comes to desserts, especially during Halloween! These pudding cups can be served in adorable clear buckets that showcase their colorful layers.
Garnishes
-
Edible Eyes: Add some edible candy eyes on top for a ghoulish touch that’s sure to delight kids (and adults!) alike.
-
Whipped Topping Swirls: A dollop of whipped topping on each cup adds a creamy finish and makes them look extra tempting.
Side Dishes
-
Spooky Fruit Salad: A mix of seasonal fruits like blood oranges, blackberries, and grapes can brighten up the table while providing a refreshing contrast to the rich pudding cups.
-
Ghostly Grilled Cheese: Serve up some grilled cheese sandwiches shaped like ghosts using cookie cutters for a fun twist on a classic comfort food.
-
Pumpkin Soup: A warm bowl of pumpkin soup would be perfect alongside these sweet treats, offering a savory balance to the meal.
-
Veggie Platter with Hummus: Create a colorful platter of fresh veggies served with hummus for dipping. It’s a healthy option that pairs well with the sweetness of the pudding cups!
With these serving suggestions and pro tips, your Halloween Pudding Cups will not only be delicious but also an eye-catching centerpiece at any gathering! Enjoy creating this spooky treat!
Make Ahead and Storage
These Halloween Pudding Cups are perfect for meal prep! You can easily make them ahead of time, allowing you to enjoy the festivities without any last-minute stress. Here’s how to store and keep your delicious treats fresh.
Storing Leftovers
- Store leftover pudding cups in the refrigerator.
- Cover each cup with plastic wrap or a lid to prevent drying out.
- Consume within 3 days for best flavor and texture.
Freezing
- It’s not recommended to freeze the assembled pudding cups, as it may affect the texture of the whipped topping and pudding.
- Instead, you can freeze the cake separately. Wrap slices tightly in plastic wrap and then place them in an airtight container.
- Thaw in the refrigerator before assembling your pudding cups.
Reheating
- There’s no need to reheat your Halloween Pudding Cups. They are best enjoyed chilled straight from the fridge!
- If you’ve frozen the cake, you can pop it into the microwave for a few seconds if you prefer it warm, but allow it to cool before assembling.
FAQs
If you have questions about making these delightful Halloween Pudding Cups, you’re not alone! Here are some common inquiries.
Can I use other flavors of pudding for Halloween Pudding Cups?
Absolutely! While white chocolate pairs wonderfully with chocolate cake, feel free to experiment with vanilla or even butterscotch pudding for a fun twist.
How long do Halloween Pudding Cups last in the fridge?
When stored properly, these Halloween Pudding Cups can last up to 3 days in the fridge. Just be sure to cover them well!
What is the best way to decorate my Halloween Pudding Cups?
You can get creative with decorations! Use Halloween candies like gummy worms, chocolate spiders, or colorful sprinkles. The more festive, the better!
Can I make Halloween Pudding Cups without whipped topping?
Yes! If you prefer a lighter option or want to avoid whipped topping, you can substitute it with coconut whipped cream or leave it out entirely for a less rich dessert.
Final Thoughts
I hope this recipe brings joy and sweetness to your Halloween celebrations! These Halloween Pudding Cups are not only visually stunning but also delightfully tasty. They’re sure to be a hit at any gathering. Enjoy making them with friends or family, and don’t forget to share your spooky creations! Happy haunting!
Halloween Pudding Cups
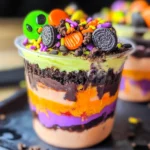
Looking for a fun and festive dessert to celebrate Halloween? These Halloween Pudding Cups are the perfect treat! Combining layers of creamy white chocolate pudding, chocolate cake, and crushed cookies, these spooky delights are not only delicious but also visually striking. They’re simple to make, making them a great activity for the whole family. Whether you’re hosting a Halloween party or just want to bring some seasonal cheer to your day, these cups are sure to impress kids and adults alike. With vibrant colors and delightful flavors, they will be the highlight of any gathering!
- Prep Time: 20 minutes
- Cook Time: 30 minutes
- Total Time: 50 minutes
- Yield: Approximately 10 servings 1x
- Category: Dessert
- Method: Baking
- Cuisine: American
Ingredients
- 1 box devil's food cake mix
- 4 cups cold milk
- 2 boxes white chocolate instant pudding
- 8 ounces whipped topping
- Crushed Oreo cookies
- Food coloring (neon green, orange, purple)
Instructions
- Preheat your oven to 350°F (175°C). Prepare the devil's food cake according to package instructions using water, oil, and eggs. Bake and let cool before cutting into cubes.
- In a large bowl, whisk together the white chocolate pudding mix and cold milk until thickened. Divide into three bowls and add food coloring to each.
- In clear cups or buckets, layer cake cubes, colored pudding, and crushed Oreos in alternating layers until filled. Top with whipped cream and festive decorations like Halloween candies.
Nutrition
- Serving Size: 1 cup (200g)
- Calories: 290
- Sugar: 28g
- Sodium: 320mg
- Fat: 12g
- Saturated Fat: 6g
- Unsaturated Fat: 4g
- Trans Fat: 0g
- Carbohydrates: 43g
- Fiber: 2g
- Protein: 5g
- Cholesterol: 15mg