Grilled Corn On The Cob
If you’re looking for a quick and delightful side dish that screams summer, then you’ve just found it! This Grilled Corn On The Cob is a staple for family gatherings, picnics, and backyard barbecues. There’s something truly special about the way the heat transforms sweet corn into a smoky, flavorful treat that everyone loves. Plus, it’s so easy to make that you can whip it up even on busy weeknights!
Imagine biting into tender corn kernels with that perfect char, slathered in butter and sprinkled with salt. It’s comfort food at its finest and a dish that brings people together. Whether it’s the Fourth of July or just a sunny Saturday, this recipe will surely impress your friends and family.
Why You’ll Love This Recipe
- Quick and Easy: With just two main ingredients and minimal prep time, you can have this dish ready in no time.
- Family-Friendly: Kids and adults alike adore grilled corn! It’s the perfect side to any meal.
- Flexible Serving Options: Enjoy it straight off the grill or dress it up with spices; the choice is yours!
- Perfect for Summer: Nothing says summer quite like grilling outdoors with loved ones.
- Healthy Side Dish: Naturally gluten-free, nut-free, and vegetarian, it fits into many dietary preferences!
Ingredients You’ll Need
This recipe calls for simple and wholesome ingredients that you probably already have on hand. You won’t need anything fancy—just fresh corn, butter, and salt to enhance its natural sweetness.
For Grilled Corn On The Cob
- 4 ears of corn, shucked
- Unsalted butter, for serving
- Kosher salt
Variations
One of the best things about grilled corn is how flexible it is! You can easily customize the flavors to match your taste or what you have on hand.
- Add spices: Sprinkle on some chili powder or paprika for a little kick.
- Herb-infused butter: Mix in fresh herbs like cilantro or parsley into your butter for an extra layer of flavor.
- Cheesy goodness: After grilling, sprinkle with crumbled cheese like feta or cotija for a savory twist.
- Citrus zing: A squeeze of lime or lemon juice over the top brightens up the flavor beautifully.
How to Make Grilled Corn On The Cob
Step 1: Prepare Your Grill
Start by preparing your grill for high heat. Preheating is essential as it helps achieve those beautiful char marks that give grilled corn its beloved flavor. If you’re using a grill pan, heat it over high heat.
Step 2: Grill the Corn
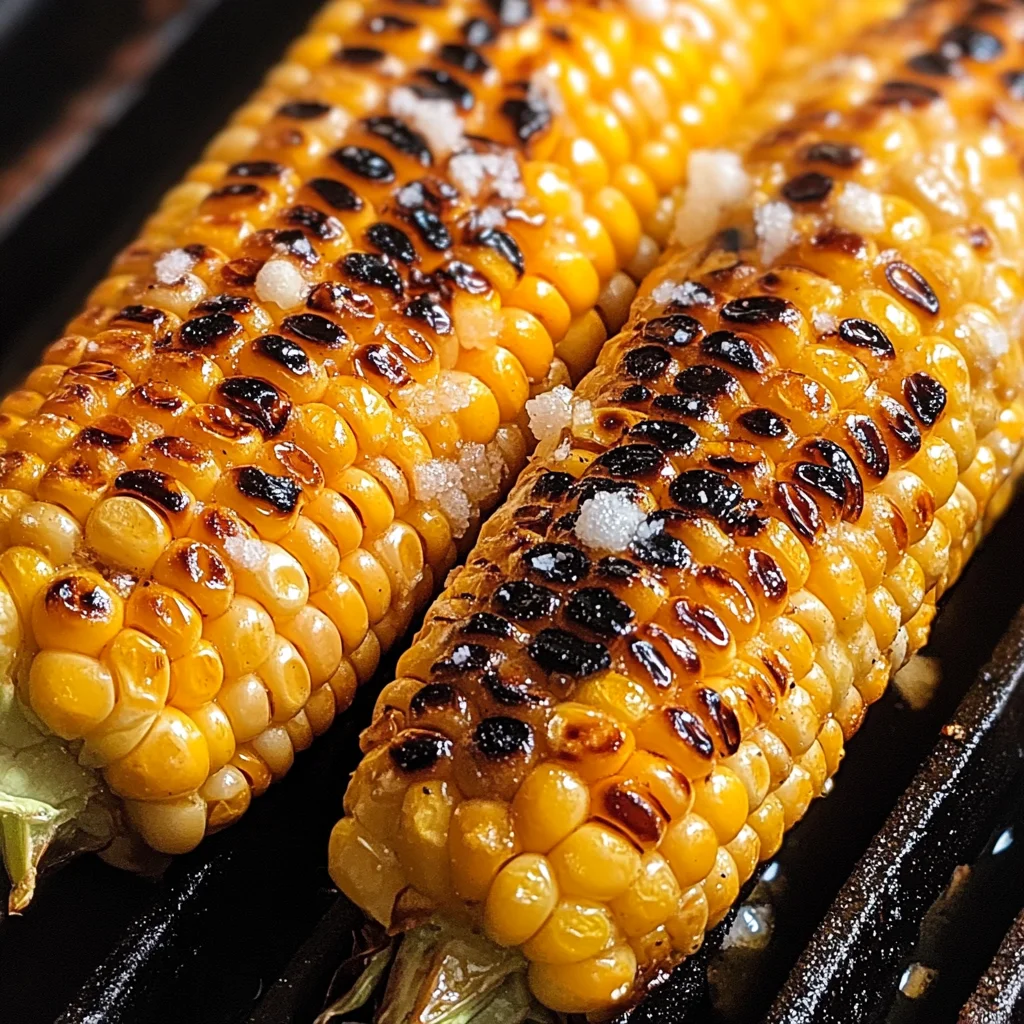
Place your shucked corn directly on the grill grates (or in your grill pan). Turn them often to ensure they cook evenly. In about 10 minutes, they should be nicely charred all over. This step is where all the magic happens—the high heat caramelizes the sugars in the corn.
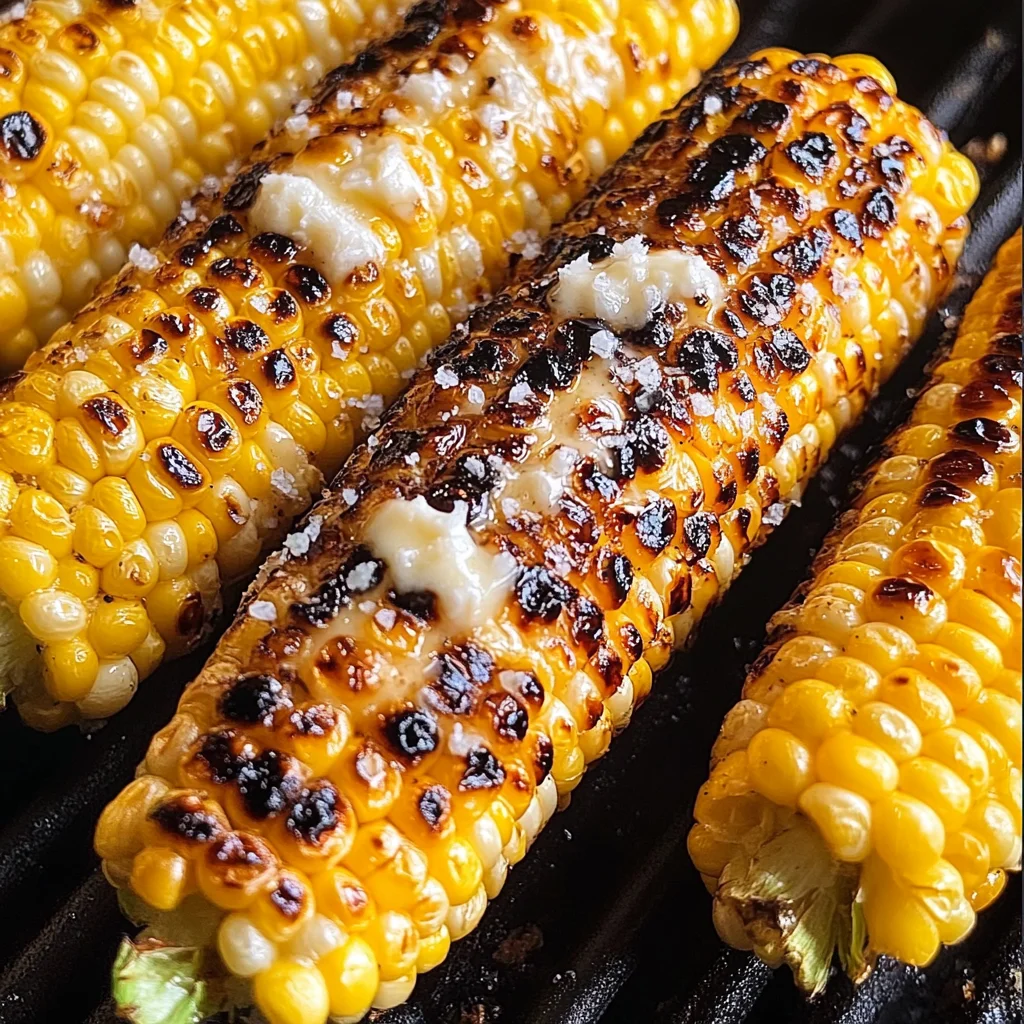
Step 3: Serve with Butter and Salt
Once your corn is beautifully grilled, remove it from the heat. While it’s still warm, spread some unsalted butter over each ear of corn. Don’t hold back! Then finish with a sprinkle of kosher salt to taste. This final touch enhances all those wonderful flavors!
Enjoy this delightful Grilled Corn On The Cob at your next gathering or as an easy weeknight treat! It’s bound to become a favorite in your household too.
Pro Tips for Making Grilled Corn On The Cob
Grilling corn on the cob is a breeze, but a few simple tips can take your corn from good to absolutely amazing!
-
Choose Fresh Corn: Opt for sweet, fresh corn with bright green husks and plump kernels. Fresh corn enhances the natural sweetness and flavor, making your grilled corn more delicious.
-
Soak in Water (Optional): If you’re grilling with the husk on, soaking the ears in water for about 30 minutes helps create steam while they cook. This results in tender and juicy corn that’s bursting with flavor.
-
Rotate Frequently: Turn the corn every few minutes while grilling. This ensures even charring and caramelization, giving you that irresistible smoky flavor all around.
-
Use Quality Butter: When it comes to serving, using high-quality unsalted butter will enhance the flavor of your grilled corn. It melts beautifully over warm corn, creating a rich, savory taste that everyone will love.
-
Experiment with Seasonings: Don’t be afraid to get creative! Besides salt, try adding spices like paprika or chili powder for a kick, or sprinkle fresh herbs like cilantro or parsley for an extra layer of freshness.
How to Serve Grilled Corn On The Cob
Serving grilled corn on the cob is as fun as it is delicious! You can get creative with garnishes and side dishes to make it a memorable addition to any meal.
Garnishes
- Chopped Fresh Herbs: Sprinkle finely chopped basil or cilantro over the top for a burst of freshness.
- Lime Wedges: Serve wedges of lime alongside the corn; a squeeze of lime juice adds a zesty twist that complements the sweetness perfectly.
- Parmesan Cheese: For those who enjoy cheese, grating some dairy-free parmesan on top adds a delightful umami flavor.
Side Dishes
-
Grilled Veggie Skewers: Colorful skewers of bell peppers, zucchini, and cherry tomatoes are perfect companions. The smoky char from grilling enhances their natural sweetness and makes them vibrant additions to your plate.
-
Quinoa Salad: A refreshing quinoa salad with cucumbers, tomatoes, and a light vinaigrette pairs beautifully with grilled corn. The nutty flavor of quinoa complements the sweet corn nicely while adding protein to your meal.
-
Potato Salad: A classic summer potato salad brings creamy richness to your barbecue spread. Its cool texture contrasts wonderfully with warm grilled corn.
-
Coleslaw: A crunchy coleslaw adds texture and brightness to your meal. The crisp cabbage and tangy dressing create a perfect balance when served alongside grilled dishes.
Now that you have these tips and serving suggestions at your fingertips, you’re ready to impress your family and friends with the best grilled corn on the cob they’ve ever tasted! Enjoy every delicious bite!
Make Ahead and Storage
This Grilled Corn On The Cob recipe is perfect for meal prep and makes it easy to enjoy delicious grilled corn throughout the week. Here’s how to store, freeze, and reheat your tasty leftovers.
Storing Leftovers
- Place any leftover grilled corn in an airtight container.
- Store in the refrigerator for up to 3 days.
- If you want to keep them longer, consider freezing them (see below!).
Freezing
- Allow the grilled corn to cool completely before freezing.
- Wrap each ear tightly in plastic wrap or aluminum foil.
- Place wrapped corn in a freezer-safe bag or container.
- Freeze for up to 3 months for the best flavor and texture.
Reheating
- Thaw frozen corn in the refrigerator overnight before reheating.
- Grill on medium heat for about 5-7 minutes, turning frequently until heated through.
- Alternatively, you can microwave it: place a damp paper towel over the corn and microwave for 1-2 minutes or until warmed.
FAQs
Here are some common questions you might have about making Grilled Corn On The Cob!
Can I grill corn on the cob with the husk on?
Absolutely! Grilling corn on the cob with the husk provides a great steamy effect that keeps the kernels juicy. Just soak the ears in water for about 30 minutes before grilling.
What is the best way to serve Grilled Corn On The Cob?
The simplest way is to spread unsalted butter over warm corn and season it with kosher salt. You can also get creative with toppings like lime juice, chili powder, or fresh herbs!
How do I know when my Grilled Corn On The Cob is done?
Look for a nice char on all sides of the corn. It should take about 10 minutes of grilling time, turning frequently. The kernels will be tender when fully cooked.
Can I make Grilled Corn On The Cob ahead of time?
Yes! Grilled corn can be made ahead of time and stored (or frozen) as described above. Just reheat when you’re ready to enjoy it!
Final Thoughts
I hope you find joy in making this Grilled Corn On The Cob recipe! It’s not just a side dish—it’s a summer staple that brings friends and family together at picnics and barbecues. Enjoy its smoky flavor and sweet crunch while creating wonderful memories around your grill! Happy cooking!
grilled
Grilled Corn On The Cob
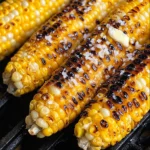
Indulge in the vibrant flavors of summer with this Grilled Corn On The Cob recipe, a delightful side dish perfect for picnics, barbecues, and family gatherings. Imagine sinking your teeth into tender, sweet corn kernels, kissed by the grill’s smoky heat and topped with creamy unsalted butter and a sprinkle of kosher salt. This quick and easy recipe requires just a few ingredients and minimal preparation time, making it an ideal choice for busy weeknights or festive occasions. Elevate the experience by adding herbs, spices, or even a squeeze of fresh citrus juice for an extra layer of flavor. Whether served as a standalone treat or paired with your favorite grilled meats or salads, this dish captures the essence of summer dining at its finest.
- Prep Time: 5 minutes
- Cook Time: 10 minutes
- Total Time: 15 minutes
- Yield: Serves 4
- Category: Side Dish
- Method: Grilling
- Cuisine: American
Ingredients
- 4 ears of corn (shucked)
- Unsalted butter (for serving)
- Kosher salt
Instructions
- Prepare your grill by preheating it to high heat.
- Place the shucked corn directly on the grill grates, turning every few minutes until charred all over, about 10 minutes.
- Remove from heat and generously spread unsalted butter over each ear while still warm. Finish with a sprinkle of kosher salt to taste.
Nutrition
- Serving Size: 1 serving
- Calories: 130
- Sugar: 6g
- Sodium: 15mg
- Fat: 5g
- Saturated Fat: 3g
- Unsaturated Fat: 2g
- Trans Fat: 0g
- Carbohydrates: 22g
- Fiber: 2g
- Protein: 3g
- Cholesterol: 10mg