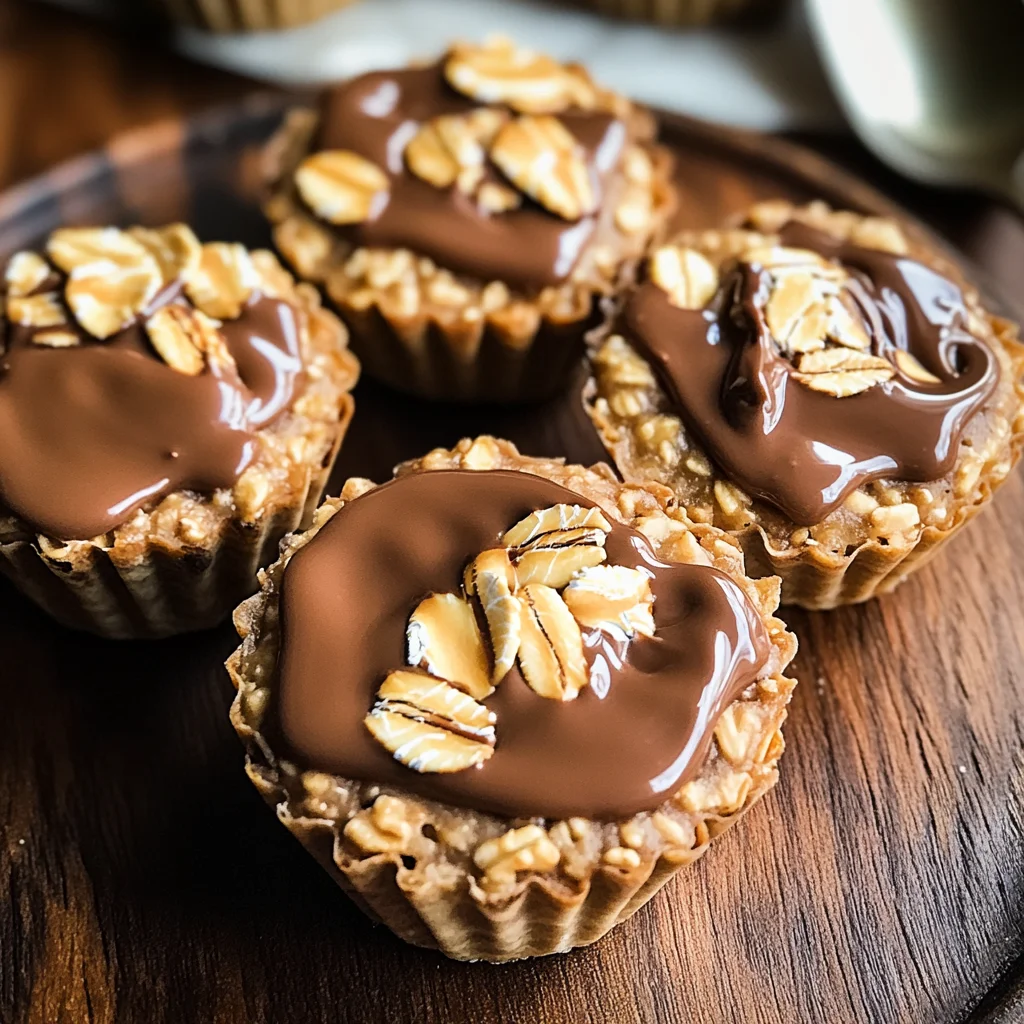
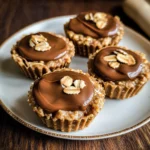
No-Bake Peanut Butter Oat Cups
If you’re looking for a quick and delicious treat that the whole family will love, you’ve come to the right place! These No-Bake Peanut Butter Oat Cups are a perfect blend of wholesome ingredients and sweet satisfaction. Whether it’s a busy weeknight or a weekend gathering, these little cups are sure to be a hit. They’re easy to whip up, and you can feel good about serving them to your loved ones.
What makes this recipe special is how simple yet satisfying it is. With just a handful of ingredients, you’ll create something that feels indulgent but is packed with nutrition. Plus, they require no baking at all! Let’s dive into why these No-Bake Peanut Butter Oat Cups are going to become your new favorite snack.
Why You’ll Love This Recipe
- Super Easy to Make: You can whip these up in just 10 minutes, and there’s no oven involved!
- Family-Friendly Fun: Kids love helping out with the mixing and pressing—making it a fun activity together.
- Versatile Treat: Perfect for lunchboxes, after-school snacks, or even as a healthy dessert.
- Nutritious Ingredients: Packed with oats and peanut butter, these cups provide energy without the guilt.
- Make Ahead Convenience: Prepare them in advance and store them in the fridge for quick snacks throughout the week.
Ingredients You’ll Need
These No-Bake Peanut Butter Oat Cups use simple and wholesome ingredients that you probably already have on hand. Let’s gather what we need for this deliciously easy recipe!
For the Oat Cups
- 1 cup rolled oats
- 1/2 cup natural peanut butter
- 1/4 cup honey or maple syrup
- 1/4 cup dark chocolate chips (optional for topping)
- 1/2 tsp vanilla extract (optional)
- Pinch of salt (if using unsalted peanut butter)
Variations
One of the best things about these No-Bake Peanut Butter Oat Cups is how flexible they are! Feel free to mix things up based on your taste preferences or what you have on hand.
- Add Some Crunch: Toss in some chopped nuts or seeds for an extra crunch!
- Go Nut-Free: Substitute sunflower seed butter for those with nut allergies.
- Change Up the Sweetness: Use agave syrup instead of honey or maple syrup if you prefer.
- Mix in Flavors: Try adding spices like cinnamon or cocoa powder for a unique twist.
How to Make No-Bake Peanut Butter Oat Cups
Step 1: Mix It All Together
In a mixing bowl, combine the rolled oats, natural peanut butter, honey (or maple syrup), vanilla extract, and a pinch of salt if needed. Stir until everything is well mixed and sticky. This step is vital because it ensures all the ingredients bind together nicely when formed into cups.
Step 2: Form Your Cups
Spoon the mixture into a mini muffin tin, pressing firmly to form cups. To make it easier to remove them later, line the tin with cupcake liners or use a silicone muffin tray. Pressing firmly helps the oat cups hold their shape once set.
Step 3: Add Some Chocolate (Optional)
Melt the chocolate chips in a microwave-safe bowl in 15-second intervals, stirring between each interval until smooth. Drizzle or spread a little melted chocolate on top of each oat cup for an extra touch of sweetness—because who doesn’t love chocolate?
Step 4: Chill Out!
Place the muffin tin in the fridge for at least 1 hour to allow the cups to firm up. Once set, gently remove them from the tin and enjoy! Chilling helps solidify their shape so that every bite is perfect.
Enjoy your delightful No-Bake Peanut Butter Oat Cups! They make such a wonderful snack or dessert that you might find yourself making them again and again.
Pro Tips for Making No-Bake Peanut Butter Oat Cups
Creating delicious No-Bake Peanut Butter Oat Cups is simple, but a few tips can take your treats to the next level!
- Use fresh ingredients: Fresh rolled oats and natural peanut butter will enhance the flavor and texture of your oat cups, making them even more enjoyable.
- Adjust sweetness to taste: If you prefer a sweeter treat, feel free to add a touch more honey or maple syrup. Tasting as you go ensures that your cups are just right for your palate.
- Experiment with toppings: Besides chocolate chips, consider adding crushed nuts, seeds, or dried fruit on top for added texture and flavor. This allows you to personalize each cup!
- Chill longer for firmer cups: If you find that your oat cups are too soft, let them chill in the refrigerator for an additional 30 minutes. This will give them a firmer structure that’s easier to handle.
- Store properly: Keep any leftovers in an airtight container in the fridge for up to a week. They make for a quick snack or an easy dessert!
How to Serve No-Bake Peanut Butter Oat Cups
These delightful little cups can be served in various ways, whether you’re hosting friends or enjoying a cozy night in.
Garnishes
- Chopped nuts: A sprinkle of chopped almonds or walnuts adds a satisfying crunch and nutty flavor that complements the peanut butter perfectly.
- Coconut flakes: Toasted coconut flakes provide a tropical twist and enhance both presentation and taste.
- Fresh berries: Placing a few fresh raspberries or blueberries on top not only looks pretty but also adds a burst of freshness.
Side Dishes
- Banana slices: Creamy banana slices pair wonderfully with the rich flavors of the oat cups and add natural sweetness.
- Yogurt: A side of dairy-free yogurt (like coconut or almond yogurt) makes for a refreshing contrast and adds creaminess to every bite.
- Apple slices with nut butter: Crisp apple slices spread with additional peanut butter create a perfect balance of flavors and textures alongside your oat cups.
- Trail mix: A small bowl of trail mix offers crunchy variety and complements the chewiness of the oat cups without being overly indulgent.
With these serving suggestions and pro tips, your No-Bake Peanut Butter Oat Cups will be irresistible! Enjoy sharing this delightful treat with family and friends or savoring them all on your own. Happy snacking!

Make Ahead and Storage
These No-Bake Peanut Butter Oat Cups are perfect for meal prep! They not only save time but also provide a healthy and delicious snack option for the week ahead.
Storing Leftovers
- Keep your oat cups in an airtight container.
- Store them in the refrigerator for up to one week.
- If you prefer, separate layers with parchment paper to prevent sticking.
Freezing
- Place the oat cups in a freezer-safe container or bag.
- Layer them with parchment paper to keep them from sticking together.
- Freeze for up to three months. Thaw overnight in the fridge before enjoying.
Reheating
- These cups are best enjoyed cold or at room temperature.
- If you prefer them warmed, pop them in the microwave for about 10-15 seconds.
FAQs
Here are some common questions about making No-Bake Peanut Butter Oat Cups.
Can I use almond butter instead of peanut butter for the No-Bake Peanut Butter Oat Cups?
Yes! Almond butter works wonderfully as a substitute and will give your oat cups a slightly different flavor while still being delicious.
How do I make No-Bake Peanut Butter Oat Cups vegan?
Simply replace honey with maple syrup, and ensure that your chocolate chips are dairy-free. This way, you can enjoy these treats without any animal-derived ingredients.
Can I add other ingredients to my No-Bake Peanut Butter Oat Cups?
Absolutely! Feel free to mix in nuts, seeds, or dried fruits to customize your oat cups according to your taste preferences.
How long do No-Bake Peanut Butter Oat Cups last?
When stored properly in an airtight container in the refrigerator, they can last up to a week. They’re perfect for meal prep!
What can I use instead of chocolate chips on top of my oat cups?
If you’re looking for alternatives, you might try drizzling melted nut butter or topping with shredded coconut or chopped nuts for added texture and flavor.
Final Thoughts
I hope this recipe brings joy and satisfaction into your kitchen! The No-Bake Peanut Butter Oat Cups are not only simple to make but also incredibly versatile and delicious. They’re perfect for snacking or as a quick dessert. Enjoy every bite, and don’t hesitate to share your creations with friends and family. Happy cooking!
No-Bake Peanut Butter Oat Cups
Looking for a quick, healthy snack that everyone will enjoy? These No-Bake Peanut Butter Oat Cups are the perfect solution! Crafted from wholesome ingredients, they combine the rich flavor of natural peanut butter with the satisfying texture of rolled oats. Best of all, there’s no baking involved—just mix, form, and chill! Whether you need an after-school treat, a lunchbox addition, or a sweet dessert option, these oat cups have got you covered. Easy to make and customizable with various toppings or mix-ins, they’re a delightful way to fuel your day. Plus, they can be prepared in advance for busy weeks ahead. Your family will love these nutritious snacks!
- Prep Time: 10 minutes
- Cook Time: 0 minutes
- Total Time: 10 minutes
- Yield: Makes approximately 12 oat cups 1x
- Category: Dessert
- Method: No-Bake
- Cuisine: American
Ingredients
- 1 cup rolled oats
- 1/2 cup natural peanut butter
- 1/4 cup honey or maple syrup
- 1/4 cup dark chocolate chips (optional)
- 1/2 tsp vanilla extract (optional)
- Pinch of salt (if using unsalted peanut butter)
Instructions
- In a mixing bowl, combine rolled oats, natural peanut butter, honey (or maple syrup), vanilla extract, and salt. Mix until sticky.
- Spoon the mixture into a mini muffin tin lined with cupcake liners or use a silicone tray. Press firmly to shape.
- If desired, melt dark chocolate chips and drizzle over each oat cup.
- Chill in the refrigerator for at least 1 hour until set. Remove and enjoy!
Nutrition
- Serving Size: 1 oat cup (30g)
- Calories: 125
- Sugar: 7g
- Sodium: 56mg
- Fat: 7g
- Saturated Fat: 1g
- Unsaturated Fat: 6g
- Trans Fat: 0g
- Carbohydrates: 12g
- Fiber: 2g
- Protein: 4g
- Cholesterol: 0mg