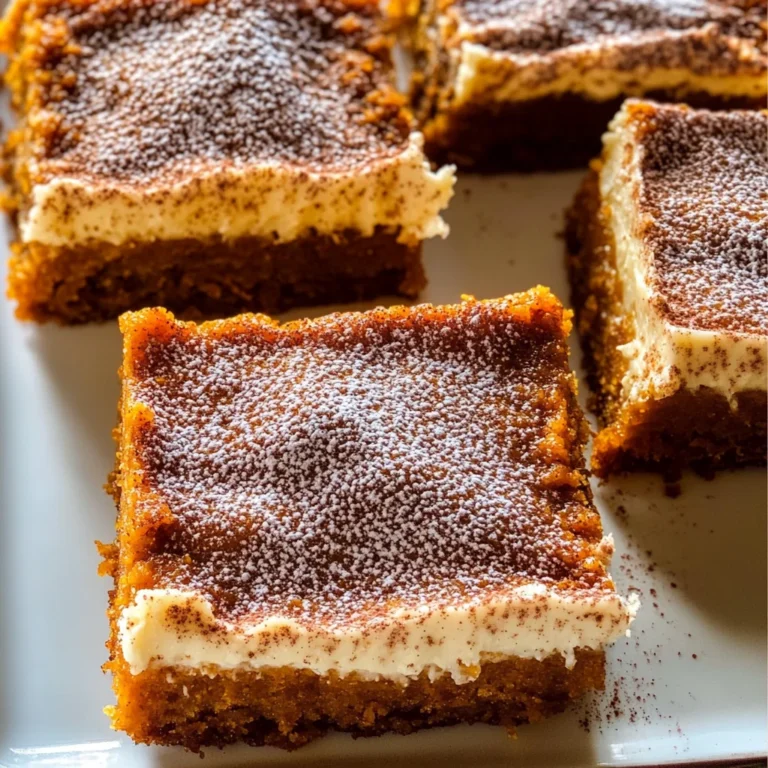
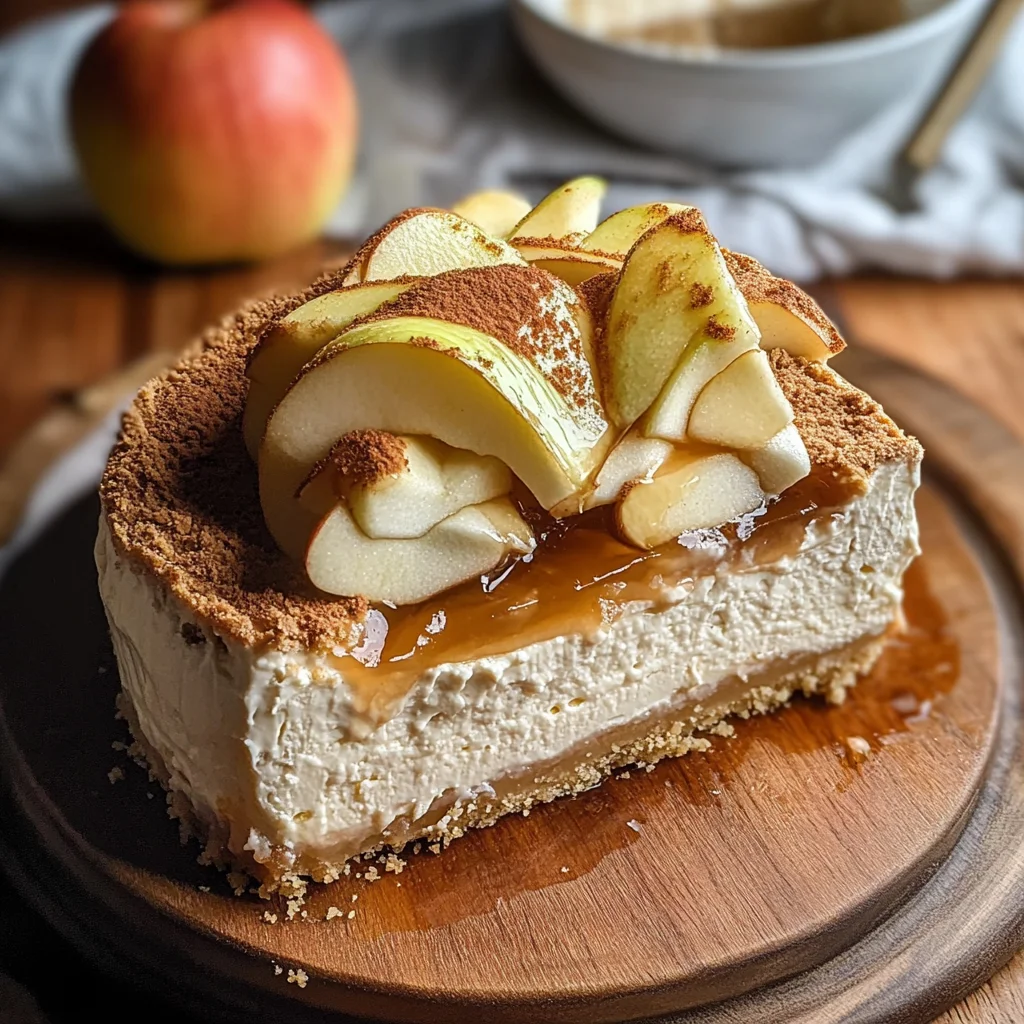
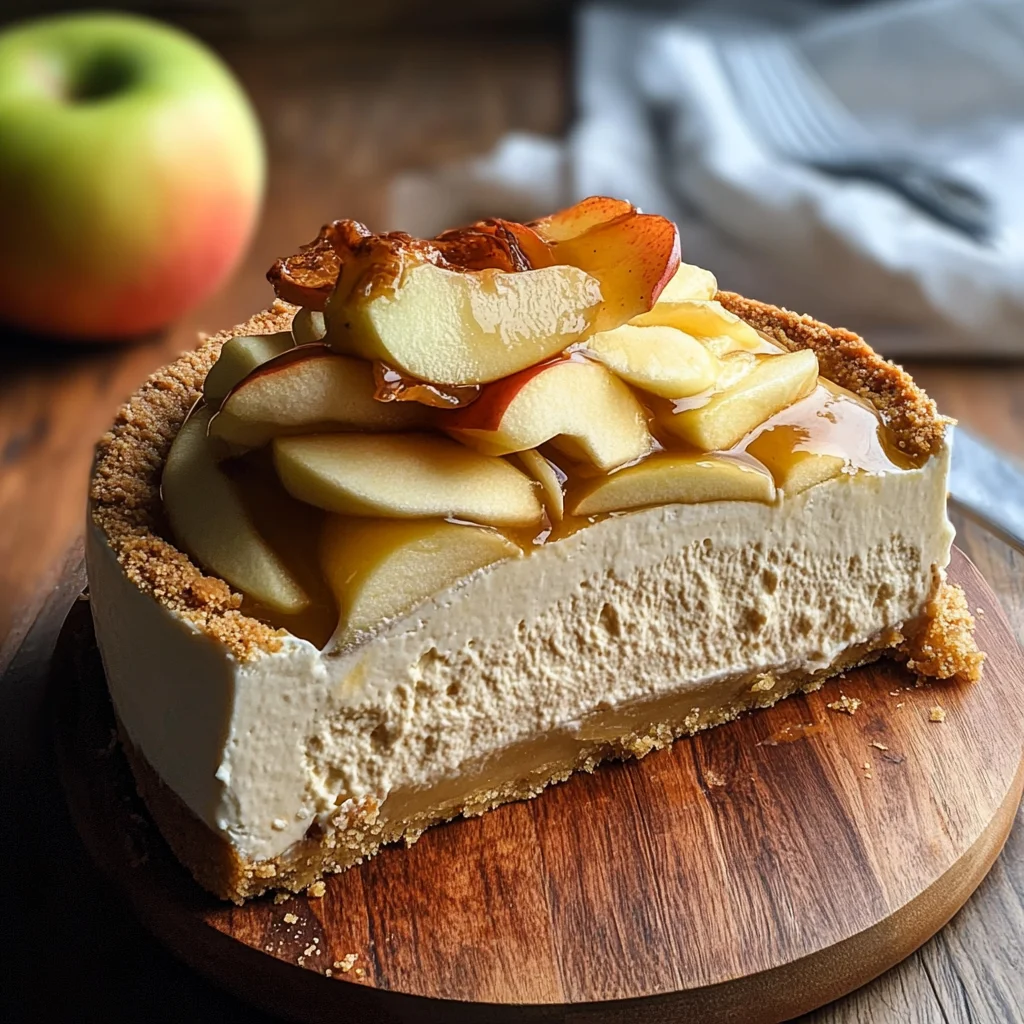
Apple Cider Cheesecake
If you’re looking for a dessert that captures the essence of autumn, this Apple Cider Cheesecake is just the treat you need! Every bite is like a cozy hug from fall itself, with its creamy texture and lovely tang from fresh apple cider. This recipe has become a favorite in my home, perfect for family gatherings, holiday celebrations, or simply when you want to enjoy something sweet and comforting after a long day.
The beauty of this cheesecake is not just in its flavor but also in how easy it is to make. You can whip it up ahead of time and let it chill in the fridge while you focus on other things. Trust me; once you serve this delightful dessert, everyone will be asking for seconds!
Why You’ll Love This Recipe
- Delicious Flavor: The combination of fresh apple cider and mulling spices creates an irresistible taste reminiscent of autumn.
- Easy Preparation: With simple steps and straightforward ingredients, even novice bakers can enjoy making this cheesecake!
- Family-Friendly Appeal: Everyone loves cheesecake! This recipe is sure to please both kids and adults alike.
- Make-Ahead Convenience: Prepare it a day in advance; it only gets better as it chills.
- Showstopper Dessert: Impress your guests with this stunning cheesecake that’s perfect for any occasion.
Ingredients You’ll Need
Gathering your ingredients for this Apple Cider Cheesecake is half the fun! These are simple, wholesome ingredients that come together beautifully to create a creamy dreamy dessert.
For the Crust
- 2 cups digestive cookies or graham crackers (270g)
- ½ cup butter (melted) (113g)
- 1/4 teaspoon salt
- 2 tablespoons powdered sugar
For the Filling
- 3 cups fresh apple cider (honeycrisp cider is more tart!)
- mulling spices
- 3 cream cheese bricks (227g each, softened and at room temperature)
- 1 cup brown sugar (220g)
- ½ teaspoon salt
- 2 teaspoons pure vanilla extract
- 1 cup sour cream (240g)
- 1/3 cup reduced apple cider (from above)
- 1 teaspoon cinnamon
- 3 large eggs
- 2 tablespoons all-purpose flour
Variations
This Apple Cider Cheesecake recipe is versatile and open to delicious tweaks! Here are some fun ideas to customize it:
- Add a fruit topping: Top with sliced apples or a drizzle of caramel sauce for an extra sweet touch.
- Change up the spices: Experiment with different spices like nutmeg or ginger for a unique flavor twist.
- Try a nut crust: Swap out the cookie crust for crushed nuts mixed with butter for added crunch.
- Make it mini: Pour the filling into muffin tins lined with cupcake liners for adorable individual cheesecakes.
How to Make Apple Cider Cheesecake
Step 1: Boil the Cider
Start by boiling the fresh apple cider with the mulling spices on high heat in a large pot. This step is crucial as it intensifies the flavors by reducing the cider into a thick syrup. After about an hour, you should have about 1/3 cup of reduced cider. Allow it to cool while you prepare other components.
Step 2: Preheat Your Oven
While your cider cools, preheat your oven to 350°F. A properly heated oven ensures an even bake for your cheesecake.
Step 3: Create the Crust
Using your food processor, pulse the digestive cookies until finely ground. Then add melted butter, salt, and powdered sugar. Pulse again until everything holds together in wet crumbs. Press these crumbs firmly into an 8-inch round springform pan or cake pan lined with parchment paper. Bake for about 10 minutes until slightly golden. Let it cool before chilling.
Step 4: Mix the Filling
Lower your oven temperature to 325°F. In your stand mixer fitted with a paddle attachment, beat together softened cream cheese and brown sugar until smooth and lump-free—this step might take some time but is worth it for that creamy texture!
Step 5: Add Flavors
Next, mix in sour cream, vanilla extract, salt, cinnamon, and your cooled reduced cider into the cream cheese mixture. Blend until everything is well combined and creamy.
Step 6: Incorporate Eggs and Flour
Add eggs one at a time followed by flour—mix just until combined; overmixing can lead to cracks later on!
Step 7: Prepare the Water Bath
Place your cheesecake pan inside a larger baking dish filled with hot water before pouring in your filling. This water bath helps create steam in the oven which keeps your cheesecake moist.
Step 8: Bake It!
Pour the filling into your prepared crust and bake for about 90 minutes. Once done, gently shake it; if the edges look set but the center still wobbles slightly, it’s ready!
Step 9: Cool Gradually
Turn off the oven but leave the cheesecake inside. Use a wooden spoon to crack open the door—this gradual cooling process prevents cracking on top.
Step 10: Final Chill
After about half an hour in the cooling oven, remove it and let cool completely on your counter before placing it in the fridge for at least eight hours or overnight if possible!
And there you have it! Your homemade Apple Cider Cheesecake awaits—perfectly creamy with just enough tartness from that lovely apple cider! Enjoy every slice!
Pro Tips for Making Apple Cider Cheesecake
Making a cheesecake can be daunting, but with a few simple tips, you can ensure your Apple Cider Cheesecake turns out perfectly every time!
-
Use room temperature ingredients: Bringing your cream cheese and eggs to room temperature helps create a smooth and creamy filling without lumps. Cold ingredients can lead to a clumpy texture.
-
Don’t overmix: When adding the eggs and flour, mix just until combined. Overmixing can incorporate too much air, leading to cracks in your cheesecake as it bakes.
-
Water bath magic: Baking the cheesecake in a water bath allows for even cooking and helps prevent the top from cracking. It creates a gentle steaming environment that keeps the cheesecake moist.
-
Cool gradually: Allowing the cheesecake to cool slowly in the oven prevents sudden temperature changes that can cause cracks. This step is essential for achieving that perfect creamy texture.
-
Chill overnight: Patience is key! Letting your cheesecake chill in the fridge for at least 8 hours (or overnight) helps it set properly and enhances its flavor.
How to Serve Apple Cider Cheesecake
Presenting your Apple Cider Cheesecake beautifully will impress friends and family alike! Here are some fun ideas to elevate your dessert game.
Garnishes
- Whipped coconut cream: A dollop of fluffy whipped coconut cream adds a delightful richness and a hint of sweetness that pairs beautifully with the tangy cheesecake.
- Caramel drizzle: Drizzling homemade or store-bought caramel sauce over the top provides an extra layer of flavor and eye-catching appeal.
- Cinnamon apple slices: Fresh apple slices dusted with cinnamon make for a lovely garnish that complements the apple flavors in the cheesecake.
Side Dishes
- Crispy autumn salad: A refreshing salad with mixed greens, walnuts, cranberries, and a light vinaigrette adds balance to the rich cheesecake.
- Spiced chai latte: Serve this warm drink alongside your dessert for a cozy pairing; the spices in chai complement the flavors of apple cider perfectly.
- Vanilla ice cream: A scoop of dairy-free vanilla ice cream provides a creamy contrast to the dense cheesecake while keeping things delightful.
- Ginger snap cookies: These crunchy cookies offer a spicy kick that goes wonderfully with the creamy flavors of your Apple Cider Cheesecake, making for an enjoyable textural contrast.
With these tips and serving suggestions, you’ll create not only an incredible dessert but also an unforgettable dining experience! Enjoy every bite of your delicious Apple Cider Cheesecake.
Make Ahead and Storage
This Apple Cider Cheesecake is perfect for meal prep! You can make it ahead of time for gatherings, potlucks, or simply to enjoy throughout the week. Here’s how to store and manage your delicious dessert.
Storing Leftovers
- Keep the cheesecake in an airtight container in the refrigerator.
- It can be stored for up to one week.
- If you want to prevent it from drying out, cover the surface with plastic wrap before sealing.
Freezing
- To freeze, wrap the cooled cheesecake tightly in plastic wrap and then in aluminum foil.
- It can be frozen for up to 3 months.
- Thaw in the refrigerator overnight before serving.
Reheating
- If you prefer your cheesecake slightly warm, place a slice on a microwave-safe plate.
- Heat in the microwave for about 15-20 seconds or until just warmed through.
- Avoid overheating as it can alter the texture.
FAQs
Have questions about making this delightful dessert? Here are some common queries!
Can I use store-bought apple cider for the Apple Cider Cheesecake?
Absolutely! Store-bought apple cider is a convenient option. Just choose a high-quality brand for the best flavor.
How long does it take to make Apple Cider Cheesecake?
The entire process takes about 90 minutes of cooking time and at least 8 hours of chilling. It’s worth every minute for that creamy texture!
Can I substitute any ingredients in the Apple Cider Cheesecake?
Yes! You can use dairy-free cream cheese and sour cream if you’re looking for alternatives. The flavor will still be delicious!
Final Thoughts
This Apple Cider Cheesecake is not just a dessert; it’s a celebration of autumn flavors wrapped in creamy goodness. I hope you enjoy making this recipe as much as I did, and that it brings warmth and joy to your table. Don’t hesitate to share your own experiences or variations; I would love to hear how yours turns out. Happy baking!
Apple Cider Cheesecake

Indulge in the delightful flavors of autumn with this Apple Cider Cheesecake. Combining the creamy richness of cheesecake with the bright, tangy notes of fresh apple cider and warm mulling spices, this dessert is a perfect centerpiece for family gatherings or holiday celebrations. With its easy preparation method, you can create this showstopper ahead of time and let it chill in the fridge while you focus on other festivities. Each slice offers a comforting taste that will leave everyone asking for seconds.
- Prep Time: 30 minutes
- Cook Time: 90 minutes
- Total Time: 2 hours
- Yield: Serves 12 1x
- Category: Dessert
- Method: Baking
- Cuisine: American
Ingredients
- 2 cups digestive cookies or graham crackers (270g)
- ½ cup butter (melted) (113g)
- 1/4 teaspoon salt
- 2 tablespoons powdered sugar
- 3 cups fresh apple cider (honeycrisp cider is more tart!)
- mulling spices
- 3 cream cheese bricks (227g each, softened and at room temperature)
- 1 cup brown sugar (220g)
- ½ teaspoon salt
- 2 teaspoons pure vanilla extract
- 1 cup sour cream (240g)
- 1/3 cup reduced apple cider (from above)
- 1 teaspoon cinnamon
- 3 large eggs
- 2 tablespoons all-purpose flour
Instructions
- Start by boiling the fresh apple cider with the mulling spices on high heat in a large pot. After about an hour, you should have about 1/3 cup of reduced cider. Allow it to cool.
- While your cider cools, preheat your oven to 350°F.
- Using your food processor, pulse the digestive cookies until finely ground. Then add melted butter, salt, and powdered sugar. Press these crumbs firmly into an 8-inch round springform pan or cake pan lined with parchment paper. Bake for about 10 minutes until slightly golden. Let it cool before chilling.
- Lower your oven temperature to 325°F. In your stand mixer fitted with a paddle attachment, beat together softened cream cheese and brown sugar until smooth and lump-free.
- Mix in sour cream, vanilla extract, salt, cinnamon, and your cooled reduced cider into the cream cheese mixture. Blend until well combined.
- Add eggs one at a time followed by flour—mix just until combined.
- Place your cheesecake pan inside a larger baking dish filled with hot water before pouring in your filling.
- Pour the filling into your prepared crust and bake for about 90 minutes. Once done, gently shake it; if the edges look set but the center still wobbles slightly, it's ready!
- Turn off the oven but leave the cheesecake inside. Use a wooden spoon to crack open the door—allow it to cool gradually.
- After about half an hour in the cooling oven, remove it and let cool completely on your counter before placing it in the fridge for at least eight hours or overnight.
Nutrition
- Serving Size: 1 slice (100g)
- Calories: 320
- Sugar: 20g
- Sodium: 210mg
- Fat: 22g
- Saturated Fat: 12g
- Unsaturated Fat: 9g
- Trans Fat: 0g
- Carbohydrates: 30g
- Fiber: 1g
- Protein: 4g
- Cholesterol: 80mg