Frankenstein Oreo Balls
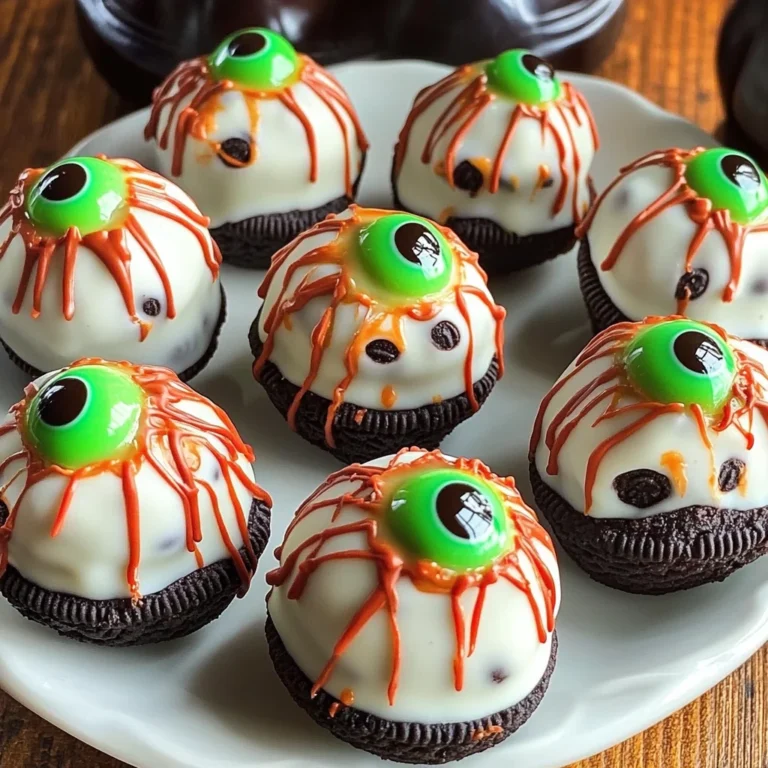
If you’re looking for a fun and festive treat to celebrate Halloween, look no further than these adorable Frankenstein Oreo Balls! They are not only easy to whip up but also a guaranteed crowd-pleaser. I love bringing them out for family gatherings, parties, or even just a cozy night in when I want to indulge my sweet tooth. The combination of creamy filling and delicious chocolate coating makes every bite a delightful surprise!
What I adore about this recipe is how simple it is to follow. You’ll have your spooky treats ready in no time, making it perfect for busy weeknights or last-minute events. Plus, the kids can even help with decorating them—trust me, they’ll have a blast transforming these little bites into their own Frankenstein creations!
Why You’ll Love This Recipe
- No-Bake Delight: These Frankenstein Oreo Balls require no baking at all. Just mix, chill, and decorate!
- Fun for All Ages: Kids will love getting involved in the decorating process, creating their very own monster faces.
- Make Ahead Convenience: Prepare these sweet treats ahead of time and store them in the fridge until you’re ready to serve.
- Deliciously Unique: The combination of Oreos and cream cheese gives these treats a rich and creamy flavor that everyone will enjoy.

Ingredients You’ll Need
These Frankenstein Oreo Balls are made with simple and wholesome ingredients that you probably already have on hand! Here’s what you’ll need to create these spooky delights:
- 36 Oreos (finely crushed)
- 8 oz cream cheese (softened at room temperature)
- 1 teaspoon vanilla extract
- 2 cups light green melting wafers
- ½ cup black or dark chocolate melting wafers
- 1-½ tablespoons Crisco shortening
- Black sprinkles (long not round)
- Pretzel sticks
- Small candy eyes
Variations
One of the best things about this recipe is its flexibility! You can easily swap out ingredients or add your own twist. Here are some fun ideas:
- Change the Colors: Use different colored melting wafers to match your party theme or favorite colors.
- Add Some Crunch: Mix in some crushed nuts or crispy rice cereal into the Oreo mixture for an extra crunch.
- Switch Up the Sprinkles: Experiment with other types of sprinkles for decoration—think Halloween-themed shapes or colors!
- Make It Mini: Instead of forming large balls, roll smaller bites for cute mini versions that are perfect for sharing!
How to Make Frankenstein Oreo Balls
Step 1: Mix the Filling
In a large mixing bowl, combine crushed Oreos, softened cream cheese, and vanilla extract. Using an electric hand mixer or stand mixer, blend the mixture for about 1-2 minutes until it forms one cohesive dough-like consistency. This step is crucial as it ensures that every bite is packed with flavor!
Step 2: Shape the Balls
Take a 2-tablespoon cookie scoop and scoop out dough from the bowl. Use your hands to roll it into smooth balls. Then press each ball down gently on top and sides to create a square shape. This unique shape will help give your Frankenstein balls that monster look! Place all shaped pieces onto a parchment-lined cookie sheet.
Step 3: Chill Before Coating
Place your cookie sheet in the refrigerator for about 2 hours. This chilling time helps firm up the balls so they hold their shape when dipped in chocolate.
Step 4: Melt the Green Coating
As your balls chill, prepare the light green melting wafers. In a microwave-safe bowl, heat them at 50% power for one minute. Stir well and add Crisco shortening before returning to the microwave in short bursts until smooth. The melted chocolate should be silky—this is key for an even coat!
Step 5: Coat Your Monsters
Using two forks or dipping tools, dip each square into the green coating completely. Gently shake off any excess chocolate before placing them back on the cookie sheet. This ensures that each ball gets an even coat without being too heavy.
Step 6: Decorate Your Treats
Immediately after coating, dip one side into black sprinkles to create Frankenstein’s hair. Next, place candy eyes on each face and insert pretzel stick pieces into the sides for bolts! This step adds personality and charm to your monster bites.
Step 7: Pipe on Some Fun
Now it’s time to use dark chocolate! Melt it following Step 4 instructions then pour it into a small Ziploc bag (make sure all air is removed). Cut a tiny hole in one corner of the bag and pipe on smiles or frowns onto each ball—get creative with your designs!
Step 8: Final Chill & Serve
Allow your Frankenstein Oreo Balls to chill again for another 30 minutes before serving. This final step helps set everything nicely so they’re ready for munching when guests arrive!
Enjoy making these spooky treats; they’re sure to bring smiles all around!
Pro Tips for Making Frankenstein Oreo Balls
Making Frankenstein Oreo Balls can be a fun and creative experience, so here are a few tips to ensure they turn out perfectly!
-
Use Room Temperature Cream Cheese – This helps the cream cheese blend smoothly with the crushed Oreos, making it easier to form a cohesive dough.
-
Chill Thoroughly – Allowing the Oreo balls to chill for the full 2 hours ensures they hold their shape when dipped in the melting wafers, resulting in a cleaner finish.
-
Thin Melting Wafers – Adding Crisco to your melting wafers creates a smoother consistency for dipping and makes it easier to coat the balls without clumping.
-
Experiment with Designs – Don’t hesitate to get creative with your piping! Different expressions on Frankenstein’s face can add character and make each ball unique.
-
Store Properly – Keep any leftovers in an airtight container in the refrigerator. They stay fresh for up to a week, making them perfect for snacking throughout Halloween season!
How to Serve Frankenstein Oreo Balls
Serving these delightful treats is just as important as making them! Here are some ideas on how you can present them in style.
Fun Presentation Ideas
Set up a spooky dessert table adorned with Halloween-themed decorations. Place the Frankenstein Oreo Balls on a black platter or cake stand surrounded by faux spider webs and plastic spiders for an extra eerie touch.
Garnishes
- Edible Glitter – A sprinkle of edible glitter adds an enchanting sparkle that captures attention and enhances the fun Halloween spirit.
- Chocolate Drizzle – A drizzle of contrasting melted chocolate can create a striking visual effect while adding extra flavor.
Side Dishes
- Pumpkin Spice Cupcakes – These moist cupcakes topped with creamy frosting add a festive touch and complement the flavors of your Oreo balls perfectly.
- Apple Slices with Caramel Dip – Fresh apple slices provide a refreshing crunch, and pairing them with caramel dip creates a delightful combination of sweet and tart.
- Spooky Cheese Platter – Create a cheese platter with various cheeses shaped as ghosts or pumpkins, pairing well with savory snacks that balance out the sweetness of your treats.
Now you’re all set to enjoy your delicious Frankenstein Oreo Balls at your next Halloween gathering! Happy haunting!

Make Ahead and Storage
Frankenstein Oreo Balls are perfect for meal prep, allowing you to create a spooky treat in advance that will wow your guests! Here’s how to store and preserve these delicious bites for later enjoyment.
Storing Leftovers
- Store leftover Frankenstein Oreo Balls in an airtight container.
- Keep them in the refrigerator for up to 5 days.
- For best results, separate layers with parchment paper to prevent sticking.
Freezing
- To freeze, place the chocolate-covered balls on a baking sheet and freeze until solid.
- Once frozen, transfer them to a freezer-safe bag or container.
- They can be stored in the freezer for up to 3 months. Just thaw in the refrigerator before serving!
Reheating
- These treats are best served chilled and do not need reheating.
- If you want to freshen up the coating, you can lightly re-dip them in melted green candy melts after thawing.
FAQs
Here are some common questions about making Frankenstein Oreo Balls!
Can I use different flavors of Oreos for Frankenstein Oreo Balls?
Absolutely! While classic Oreos work great, feel free to experiment with other flavors like mint or peanut butter for a fun twist.
How do I make sure my Frankenstein Oreo Balls look cute?
For adorable Frankenstein Oreo Balls, focus on even coating with the green melts and creative decoration! Use extra black sprinkles and keep your candy eyes aligned for that perfect monster look.
Can I make these Frankenstein Oreo Balls ahead of time?
Yes! You can prepare and chill them in advance. Just store them properly and they will stay fresh until you’re ready to serve.
What size should I make my Frankenstein Oreo Balls?
Using a 2 tablespoon cookie scoop ensures they are uniform in size. This makes decorating easier and ensures consistent chilling.
Final Thoughts
I hope you’re as excited as I am about making these delightful Frankenstein Oreo Balls! They’re not only easy to whip up but also bring a festive touch to your celebrations. It’s always wonderful to see how a bit of creativity can transform simple ingredients into something magical. Enjoy making them, sharing with friends or family, and most importantly—have fun! Happy Halloween!
Frankenstein Oreo Balls
Indulge in the festive spirit this Halloween with these delightful Frankenstein Oreo Balls! These no-bake treats combine crushed Oreos and creamy filling, coated in vibrant green chocolate for a fun and spooky presentation. Perfect for family gatherings or Halloween parties, they’re easy to make and even more enjoyable to decorate. Get your kids involved as they transform these simple bites into their own creative monster masterpieces! With a rich chocolate flavor and playful design, these treats are sure to be a hit with both kids and adults alike.
- Prep Time: 20 minutes
- Cook Time: 0 minutes
- Total Time: 20 minutes
- Yield: About 18 servings 1x
- Category: Dessert
- Method: No-Bake
- Cuisine: American
Ingredients
- 36 Oreos (finely crushed)
- 8 oz cream cheese (softened)
- 1 teaspoon vanilla extract
- 2 cups light green melting wafers
- ½ cup dark chocolate melting wafers
- 1–½ tablespoons Crisco shortening
- Black sprinkles
- Pretzel sticks
- Small candy eyes
Instructions
- In a large mixing bowl, combine crushed Oreos, softened cream cheese, and vanilla extract. Blend until smooth.
- Scoop out dough using a tablespoon and roll into balls; flatten slightly to form square shapes.
- Chill shaped balls in the refrigerator for at least 2 hours.
- Melt green wafers with Crisco in the microwave until smooth.
- Dip each ball into the melted coating and place on a cookie sheet.
- Decorate with black sprinkles, candy eyes, and pretzel pieces for bolts.
- Pipe melted dark chocolate for facial expressions.
- Chill again for 30 minutes before serving.
Nutrition
- Serving Size: 1 Oreo Ball (30g)
- Calories: 135
- Sugar: 12g
- Sodium: 40mg
- Fat: 9g
- Saturated Fat: 5g
- Unsaturated Fat: 3g
- Trans Fat: 0g
- Carbohydrates: 15g
- Fiber: 0g
- Protein: 1g
- Cholesterol: 10mg

