Halloween No Bake Cheesecake
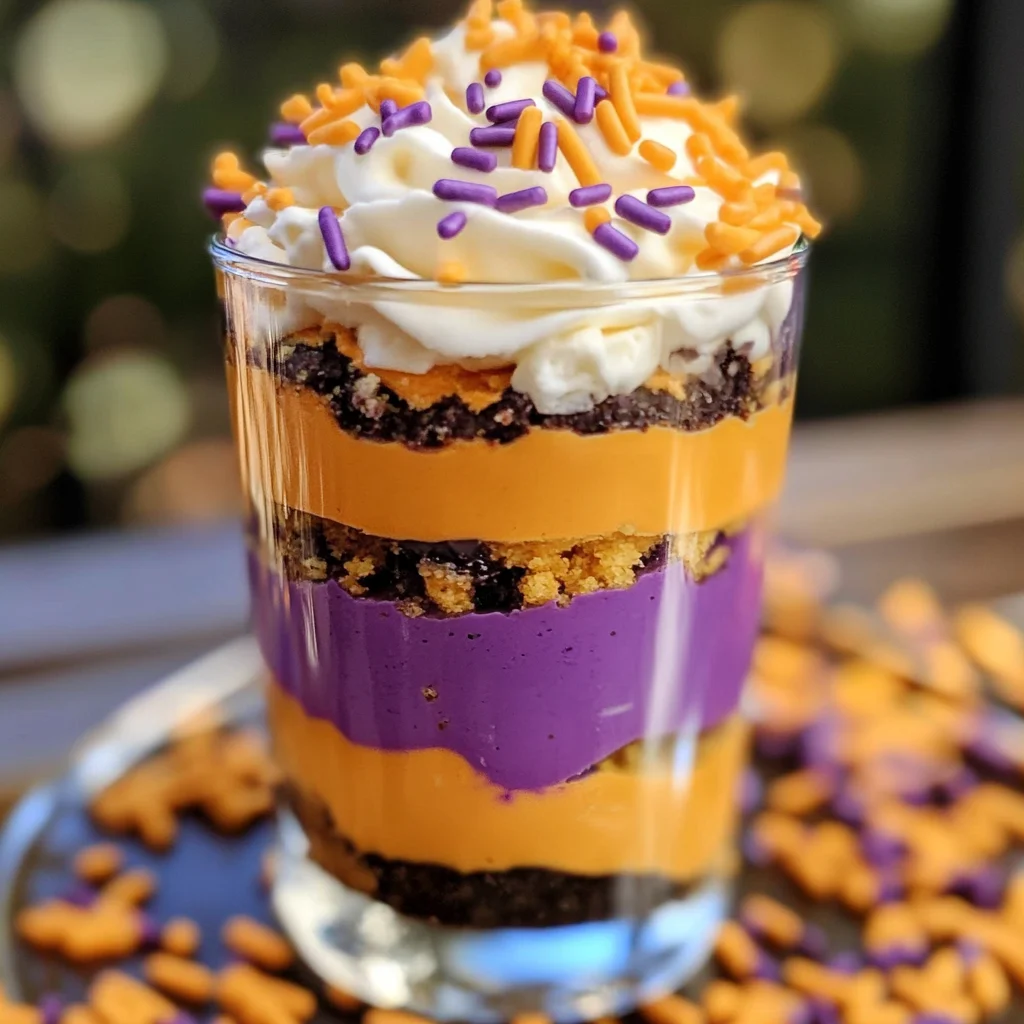
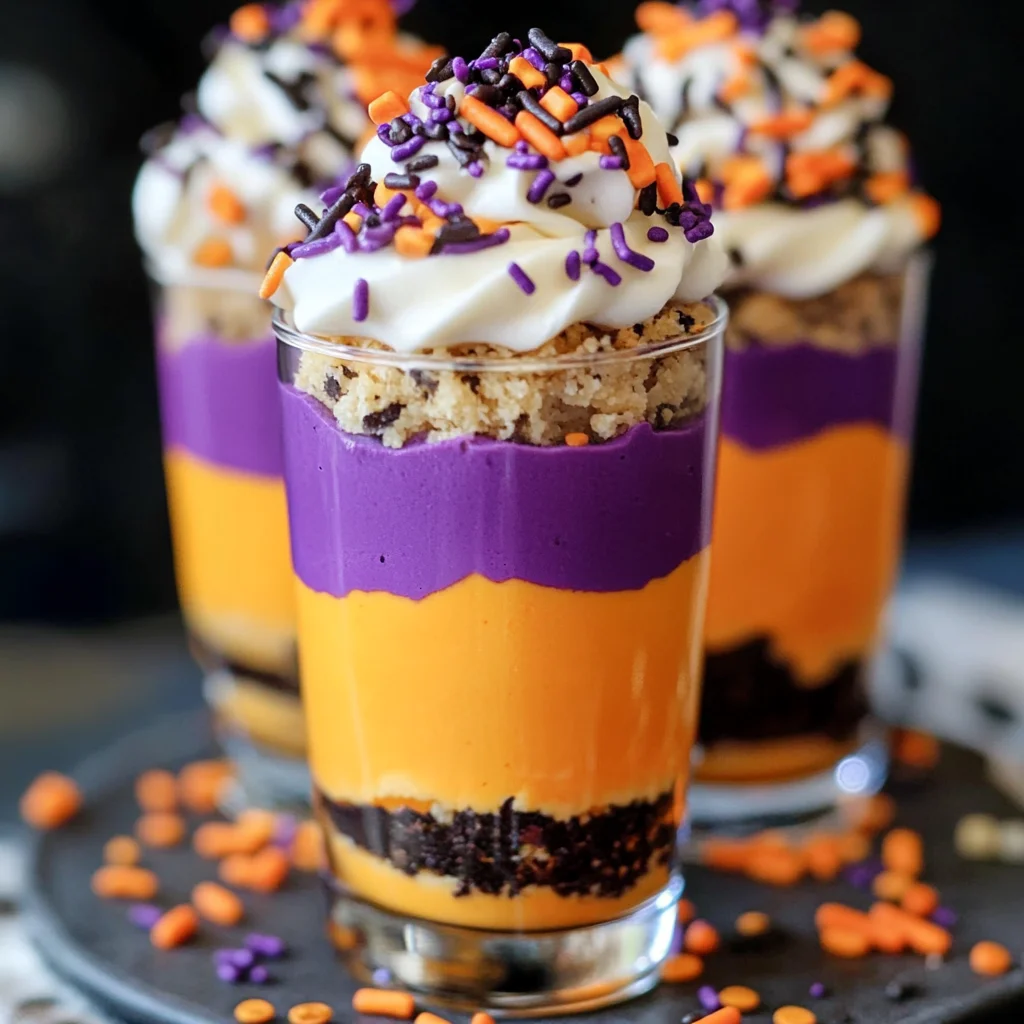
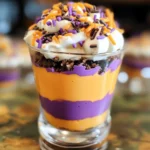
If you’re looking for a show-stopping dessert that’s super easy to whip up, then this Halloween No Bake Cheesecake is just what you need! With its vibrant orange and purple layers, this cheesecake isn’t just a treat for the taste buds; it’s also a feast for the eyes. I love how quick it comes together—less than 10 minutes of prep time means you can focus more on enjoying the festivities with friends and family.
This recipe is one of my favorites for fall gatherings, spooky movie nights, or even just a cozy evening at home. It’s so simple that even the kids can help out, making it a great way to spend some quality time in the kitchen. Plus, you can make it ahead of time and let it chill in the fridge, so it’s ready when you are!
Why You’ll Love This Recipe
- Quick and Easy: This delicious dessert comes together in no time—perfect for busy days or last-minute gatherings!
- Family-Friendly Fun: Kids will love helping with the colorful layers and decorating with sprinkles.
- Make Ahead: Prepare this cheesecake in advance and store it in the fridge until you’re ready to serve.
- Decadent Flavor: The rich cream cheese combined with whipped cream creates a heavenly texture that melts in your mouth.
- Spooky Presentation: The vibrant colors and festive toppings make this cheesecake an eye-catching centerpiece for any Halloween celebration.
Ingredients You’ll Need
For this delightful Halloween No Bake Cheesecake, you’ll only need some simple, wholesome ingredients. You probably have most of these on hand already!
For the Filling
- 2 cups heavy whipping cream
- 1 cup powdered sugar
- 1 teaspoon vanilla extract
- 8 ounces cream cheese (softened)
- orange gel food coloring
- purple gel food coloring
For the Crust
- 8 Oreo cookies
For Topping
- Sprinkles
Variations
One of the best things about this Halloween No Bake Cheesecake is how flexible it is! Feel free to get creative with flavors and colors.
- Change Up the Colors: Instead of orange and purple, try using green and black for a different spooky theme!
- Add Flavors: Mix in some pumpkin spice or chocolate syrup into your filling for an extra flavor twist.
- Use Different Cookies: Swap out Oreo cookies for graham crackers or your favorite cookie for a unique crust.
- Top It Off Differently: Instead of sprinkles, consider using crushed candy corn or chocolate shavings to add some fun texture.
How to Make Halloween No Bake Cheesecake
Step 1: Whip the Cream
Start by adding heavy whipping cream to a mixer bowl. Beat at medium speed until it starts to thicken. Then, raise the speed to high until stiff peaks form. This step is crucial because whipped cream gives our cheesecake that light and airy texture!
Step 2: Sweeten It Up
Once those peaks are formed, add powdered sugar and vanilla extract. Continue beating until everything is well combined. The sweetness from the powdered sugar balances nicely with the creamy filling we’ll be making.
Step 3: Blend in Cream Cheese
In another bowl, add softened cream cheese. Beat it until it’s light and fluffy—this should take about 2-3 minutes. Mixing it well ensures there are no lumps in our cheesecake filling.
Step 4: Combine All Together
Now it’s time to fold in that larger bowl of sweetened whipped cream into your fluffy cream cheese mixture. Beat at medium speed until everything is well combined and smooth—this is where our cheesecake gets its delightful richness!
Step 5: Add Color
Divide your mixture into two bowls. To one bowl, add 8-10 drops of orange gel food coloring; to the other bowl, add purple food coloring. Stir each bowl gently until well combined but keep them separate—how fun will those layers look?
Step 6: Prepare Your Piping Bags
Spoon your orange filling into one piping bag and purple filling into another. Then place your reserved whipped cream into a third piping bag. Standing each piping bag upright in a glass makes them easier to use later.
Step 7: Crush Those Cookies
Place your Oreo cookies into a zip-top bag—squeeze out any extra air before sealing it shut! Use a rolling pin to crush those cookies into fine crumbs; they’ll create a delicious layer at the bottom.
Step 8: Layer It Up!
Spoon crushed Oreo crumbs into each serving glass as a base layer. Alternate piping layers of orange and purple cheesecake filling on top of the crumbs for an eye-catching presentation.
Step 9: Chill Before Serving
Finally, top each glass with whipped cream and sprinkles before chilling them in the refrigerator for at least three hours. This allows all those flavors to meld beautifully together!
And there you have it—a stunning Halloween No Bake Cheesecake that’s sure to impress everyone at your gathering! Enjoy every bite!
Pro Tips for Making Halloween No Bake Cheesecake
Creating a delightful Halloween No Bake Cheesecake is all about the little details! Here are some helpful tips to ensure your dessert turns out perfectly every time.
-
Use cold cream: Starting with chilled heavy whipping cream makes it easier to whip up into stiff peaks, resulting in a fluffier cheesecake filling.
-
Be gentle when mixing colors: When adding food coloring, mix slowly to avoid overmixing. This helps maintain the beautiful orange and purple layers without losing their vibrancy.
-
Piping bags are your friends: Using piping bags for layering the cheesecake filling not only looks professional but also allows you to control the amount of filling you add to each glass.
-
Let it chill: Allowing your cheesecake to chill for at least 3 hours is crucial. This helps the flavors meld together and gives the cheesecake time to set properly.
-
Get creative with toppings: Don’t be afraid to experiment with different toppings like edible glitter or themed Halloween candies. It adds a fun touch and makes the presentation even more festive!
How to Serve Halloween No Bake Cheesecake
Presenting your Halloween No Bake Cheesecake can be as fun as making it! Here are some ideas to enhance its appearance and enjoyment.
Garnishes
- Whipped cream: A dollop of freshly whipped cream on top adds an airy texture and makes your cheesecake visually appealing.
- Chocolate shavings: Sprinkle some dark chocolate shavings on top for a rich contrast that complements the sweetness of the cheesecake.
- Candy corn: For a playful touch, add a few pieces of candy corn on top or around the base of the serving glass for that classic Halloween vibe.
Side Dishes
- Fruit salad: A refreshing fruit salad made with seasonal fruits like apples, oranges, and grapes provides a light contrast to the richness of the cheesecake.
- Pumpkin spice cookies: Pair your cheesecake with some soft pumpkin spice cookies for a deliciously cozy fall treat that complements the flavors perfectly.
- Mini pumpkin muffins: These bite-sized treats are perfect for snacking alongside your cheesecake, bringing in that quintessential autumn flavor.
- Hot apple cider: Serve your dessert with warm apple cider spiced with cinnamon sticks for a comforting beverage that enhances the Halloween spirit.
By adding these garnishes and sides, you’ll create an unforgettable dessert experience that’s sure to impress your guests this Halloween!
Make Ahead and Storage
This Halloween No Bake Cheesecake is perfect for meal prep, allowing you to create a delicious dessert ahead of time. It’s an ideal treat for parties or family gatherings, ensuring you can enjoy the festivities without being stuck in the kitchen.
Storing Leftovers
- Store any leftover cheesecake in an airtight container in the refrigerator.
- Consume within 3-4 days for the best taste and texture.
- Keep any layers separate if possible to maintain freshness.
Freezing
- To freeze, place individual servings in freezer-safe containers.
- Cover with plastic wrap and then with a lid to prevent freezer burn.
- Enjoy frozen cheesecake within 1-2 months for optimal flavor.
Reheating
- This cheesecake is best served chilled, so there’s no need to reheat.
- If you prefer a softer texture, let it sit at room temperature for about 10-15 minutes before serving.
FAQs
Have questions about this delightful Halloween No Bake Cheesecake? We’ve got answers!
Can I make this Halloween No Bake Cheesecake ahead of time?
Absolutely! You can prepare it up to 3 days in advance. Just store it in the fridge until you’re ready to serve.
What can I use instead of Oreo cookies?
You can substitute with any chocolate sandwich cookies or even gluten-free varieties if needed. Just crush them as you would Oreos!
How long does this cheesecake last?
When stored properly in the refrigerator, the Halloween No Bake Cheesecake will stay fresh for about 3-4 days.
Can I use different colors for the cheesecake layers?
Yes! Feel free to get creative with different food coloring shades to match your Halloween theme or personal preferences.
Final Thoughts
I hope you enjoy making this Halloween No Bake Cheesecake as much as I do! It’s a fun and festive way to celebrate autumn and impress your friends and family. Easy to whip up and delightful to eat, this recipe brings joy and sweetness to any gathering. Enjoy creating your masterpiece, and happy Halloween!
Halloween No Bake Cheesecake
Indulge in the festive spirit of Halloween with this delightful No Bake Cheesecake! Featuring vibrant layers of orange and purple, this creamy dessert is not only visually captivating but also incredibly easy to make. With less than 10 minutes of prep time, you can whip up a treat that’s perfect for spooky gatherings or cozy nights at home. This recipe is family-friendly, making it a fun activity for kids to help decorate and layer. Prepare it ahead of time and let it chill in the fridge—when it’s time to serve, you’ll have a stunning centerpiece that’s bound to impress everyone at your celebration!
- Prep Time: 10 minutes
- Cook Time: None
- Total Time: 0 hours
- Yield: Serves 6
- Category: Dessert
- Method: No Bake
- Cuisine: American
Ingredients
- 2 cups heavy whipping cream
- 1 cup powdered sugar
- 1 teaspoon vanilla extract
- 8 ounces cream cheese (softened)
- Orange gel food coloring
- Purple gel food coloring
- 8 Oreo cookies (or alternative cookie option)
- Sprinkles for decoration
Instructions
- Whip the heavy cream until stiff peaks form, then add powdered sugar and vanilla extract.
- In a separate bowl, beat softened cream cheese until fluffy.
- Gently fold the whipped cream into the cream cheese mixture until smooth.
- Divide the mixture into two bowls; color one orange and the other purple using gel food coloring.
- Crush Oreo cookies into fine crumbs and layer them in serving glasses.
- Alternate piping layers of orange and purple cheesecake filling over the cookie crust.
- Top each glass with whipped cream and sprinkles, then chill for at least three hours before serving.
Nutrition
- Serving Size: 1 glass (150g)
- Calories: 355
- Sugar: 28g
- Sodium: 75mg
- Fat: 26g
- Saturated Fat: 16g
- Unsaturated Fat: 9g
- Trans Fat: 0g
- Carbohydrates: 30g
- Fiber: 1g
- Protein: 4g
- Cholesterol: 90mg