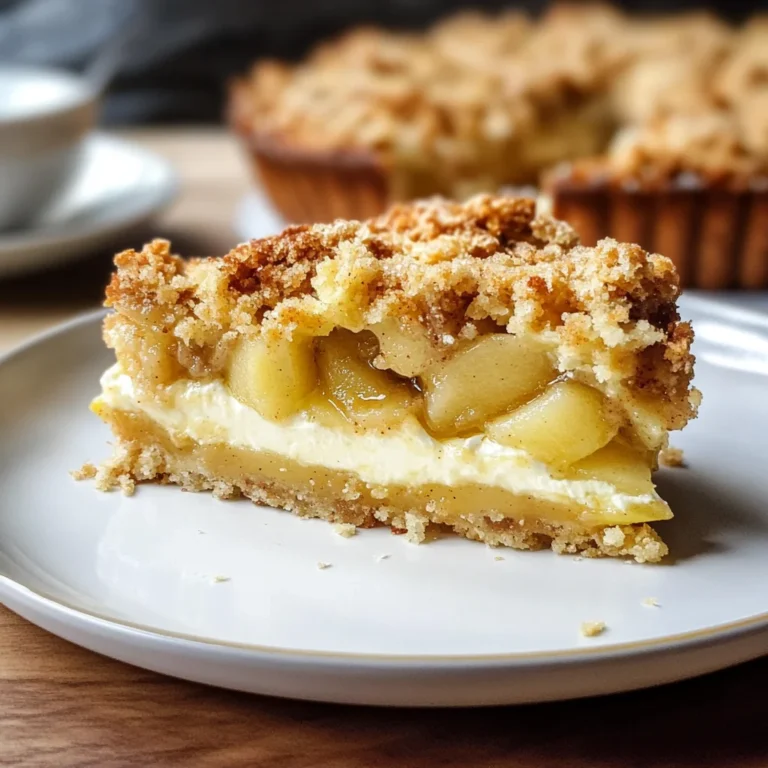
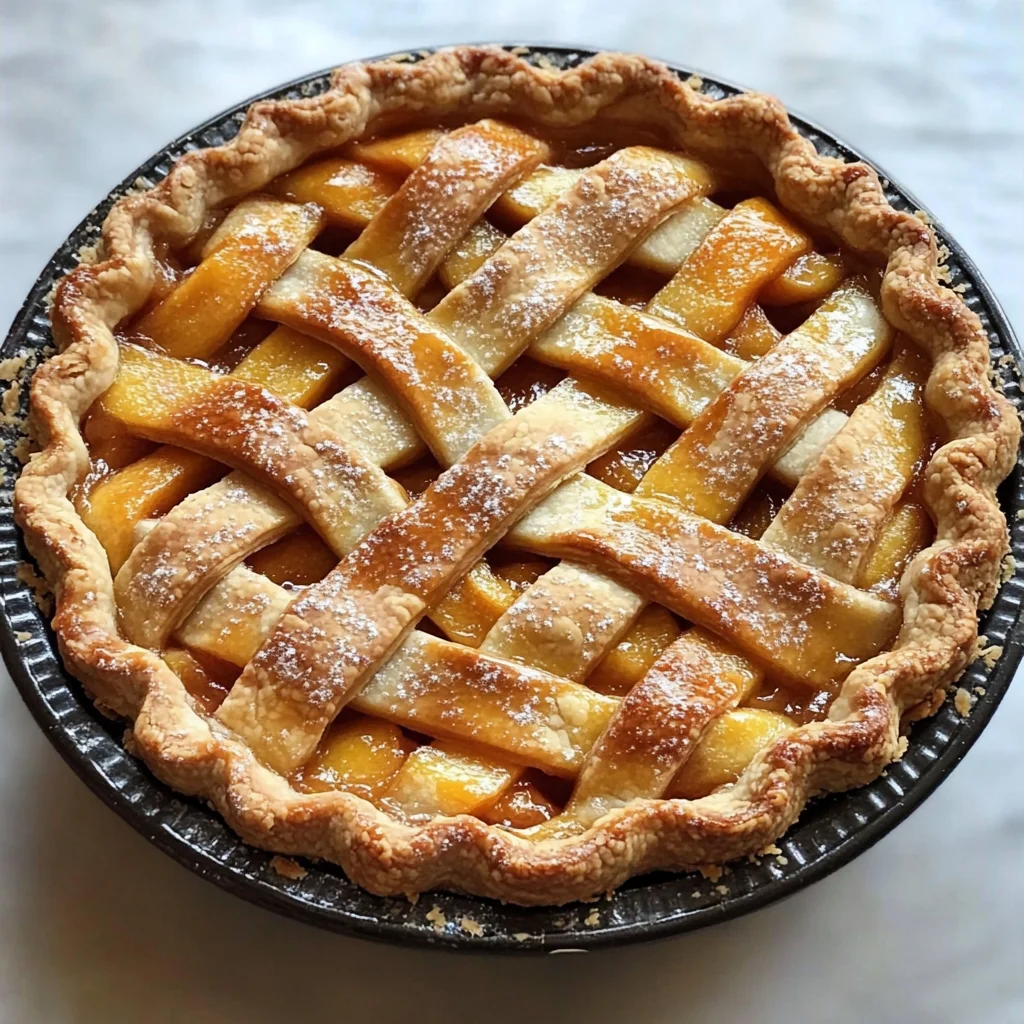
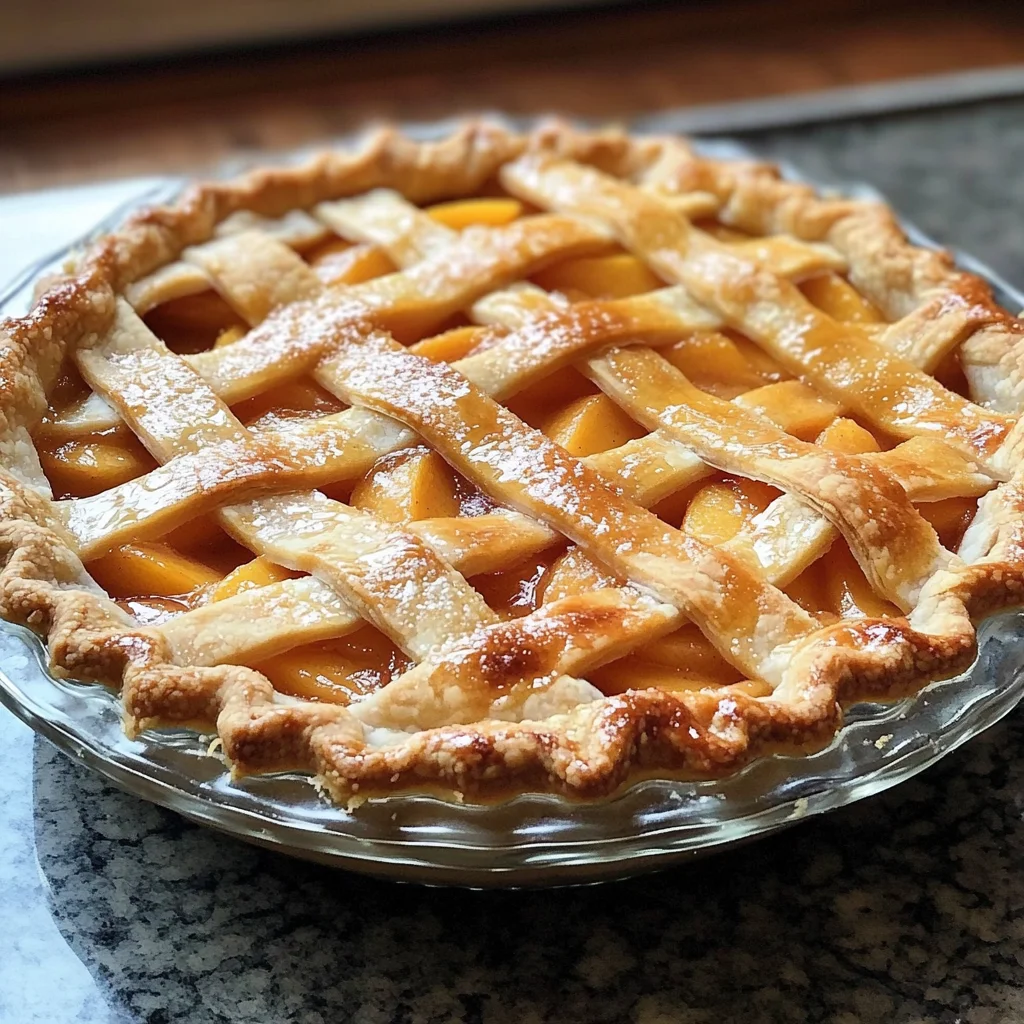
Ina Garten’s Perfect Peach Pie
If you’re looking for a delightful dessert that captures the essence of summer, then Ina Garten’s Perfect Peach Pie is just the ticket! This recipe has been a cherished part of my family gatherings, bringing joy and smiles to everyone around the table. With its sweet, juicy peaches nestled in a flaky homemade crust, each bite feels like a warm hug from the season itself. Whether it’s a cozy weeknight or a festive family gathering, this pie is perfect for any occasion.
What truly sets this recipe apart is how easy it is to make. You don’t need to be a baking expert to whip up this crowd-pleaser. Plus, the aroma that fills your kitchen while it bakes? Absolutely heavenly!
Why You’ll Love This Recipe
- Deliciously Fresh: The combination of ripe peaches and orange juice brings out a bright, summery flavor.
- Easy Homemade Crust: Making your own pie crust may sound daunting, but it’s simple and so rewarding!
- Family-Friendly Fun: Everyone can join in on the fun of making this pie—perfect for bonding time.
- Versatile Serving Options: Enjoy it warm with ice cream or at room temperature with whipped topping; either way, it’s delectable!
- Make-Ahead Friendly: You can prepare parts of the pie ahead of time and bake it just before serving.
Ingredients You’ll Need
Let’s gather our ingredients! This recipe uses simple, wholesome ingredients that you can easily find at your local grocery store. Here’s what you’ll need:
For the Pie Filling
- 2 1/2 lb. ripe peaches (6-7 large peaches, peeled)
- 1/2 C. sugar, plus extra for sprinkling on lattice
- 2 tbsp. cornstarch
- 1/2 tsp. grated orange zest
- 1/4 C. freshly squeezed orange juice
- 1 tbsp. unsalted butter
For the Pie Crust
- 12 tbsp. very cold butter
- 3 C. all-purpose flour
- 1 tsp. kosher salt
- 1 tbsp. sugar
- 1/3 C. very cold vegetable shortening
- 1/2 C. ice water
For Egg Wash
- 1 egg beaten with 1 tablespoon water
Now that we have everything ready, let’s dive into making this delicious pie!
Variations
Feel free to get creative! This recipe is flexible and allows for some fun variations:
- Add Berries: Mix in some blueberries or raspberries for an extra layer of flavor.
- Try Different Citrus: Swap out orange zest and juice for lemon or lime for a zesty twist.
- Spice it Up: Add a pinch of cinnamon or nutmeg to the filling for warmth and depth.
- Nutty Crust Option: Incorporate ground almonds or walnuts into your crust for added texture.
How to Make Ina Garten’s Perfect Peach Pie
Step 1: Prepare the Perfect Pie Crust
Start by dicing the very cold butter and putting it back in the refrigerator while you mix your dry ingredients. In a food processor, combine flour, salt, and sugar then pulse to mix them together. Once combined, add in the butter and shortening and pulse until you reach pea-sized pieces—this will make your crust flaky! Next, with the machine running, slowly pour in ice water until a ball of dough forms.
Step 2: Chill Out!
Once your dough comes together, turn it out onto a floured board and gently form it into a ball. Wrap it in plastic wrap and pop it into the refrigerator for about 30 minutes to chill; this helps relax the gluten in the dough so it rolls out beautifully later.
Step 3: Roll Out Your Dough
After chilling, lightly flour your countertop again and cut your dough in half—one half will be your bottom crust and the other will be for the top. Roll one half into a circle larger than your pie dish so that it fits nicely when placed inside.
Step 4: Prepare Your Peach Filling
Preheat your oven to 400 degrees Fahrenheit and line a sheet pan with parchment paper to catch any drips while baking. Peel and slice most of your peaches (leaving one aside), then chop that last peach into small pieces. Combine sugar, cornstarch, orange zest, orange juice, and butter over medium heat until boiling; add those chopped peach pieces right at the end!
Step 5: Combine & Thicken
Lower heat after boiling everything together for about 2-3 minutes until thickened; pour this wonderful syrup mixture over your sliced peaches along with some flour to help thicken it even more.
Step 6: Assemble Your Pie
Pour that luscious peach filling into your prepared crust after brushing egg wash around its edges to help stick on those top strips later on.
Step 7: Create Your Lattice Top
Roll out that second half of dough just like you did before! Cut strips from it to weave over your pie filling—if you’re feeling creative, go wild with designs! Pinch edges together using a fork to seal everything up nicely.
Step 8: Bake It Up!
Brush more egg wash over your lattice top followed by sprinkling sugar all over—it gives such lovely sweetness! Bake on that prepared sheet pan until golden brown (about 45 minutes). Turn halfway through baking so everything cooks evenly.
Step 9: Cool & Serve
Once baked perfectly golden brown and bubbly inside, let your pie cool down before digging in! Enjoy warm or at room temperature—it’s wonderful either way!
And there you have it—a slice of Ina Garten’s Perfect Peach Pie is sure to brighten anyone’s day!
Pro Tips for Making Ina Garten’s Perfect Peach Pie
Making a pie can be a delightful experience, especially when you have a few tips up your sleeve to ensure everything turns out just right!
-
Use ripe peaches: Choosing perfectly ripe peaches will enhance the flavor and sweetness of your pie, ensuring that every bite bursts with juicy goodness.
-
Chill the dough thoroughly: Letting your pie crust chill for at least 30 minutes helps prevent shrinkage during baking, resulting in a beautiful, flaky crust that holds its shape.
-
Blind bake the crust (optional): Pre-baking the bottom crust for about 10 minutes before adding the filling can help prevent it from becoming soggy, especially if your peaches are very juicy.
-
Adjust sweetness to taste: Depending on the ripeness of your peaches, feel free to adjust the amount of sugar in the filling. Taste-testing is encouraged to find that perfect balance!
-
Let it cool before serving: Allowing your pie to cool for at least 30 minutes after baking will help it set properly and make slicing easier without losing the filling.
How to Serve Ina Garten’s Perfect Peach Pie
Serving this delightful peach pie is as much about presentation as it is about flavor. Here are some ideas to elevate your dessert!
Garnishes
- Fresh mint leaves: A sprig or two of mint on top adds a pop of color and a fresh aroma that complements the sweet peaches beautifully.
- Whipped coconut cream: For a dairy-free option, serve with whipped coconut cream. It’s light and adds a creamy texture that pairs wonderfully with fruit pies.
- Cinnamon dusting: A light sprinkle of cinnamon over individual slices brings warmth and enhances the natural flavors of the peaches.
Side Dishes
- Vanilla ice cream: The classic pairing with warm peach pie; its creamy texture and rich flavor contrast nicely with the tartness of the peaches.
- Greek yogurt with honey: This tangy side dish adds a touch of sophistication and balances out the sweetness of the pie while providing a protein boost.
- Fresh fruit salad: A refreshing side of mixed fruits can brighten up your meal and add more healthy options to your dessert spread.
- Lemon sorbet: For a light palate cleanser, lemon sorbet offers a zesty contrast that refreshes before or after enjoying your slice of peach pie.
By following these tips and serving suggestions, you’re sure to impress family and friends with Ina Garten’s Perfect Peach Pie—an unforgettable summer treat!
Make Ahead and Storage
This Perfect Peach Pie is not only delicious but also a fantastic option for meal prep. You can prepare it ahead of time and enjoy it at your convenience!
Storing Leftovers
- Allow the pie to cool completely before covering it to avoid condensation.
- Store in the refrigerator, covered loosely with foil or plastic wrap, for up to 3 days.
- If you have leftover slices, place them in an airtight container.
Freezing
- Freeze the unbaked pie by wrapping it tightly in plastic wrap, then aluminum foil.
- It can be frozen for up to 3 months. Just remember to label it!
- To bake from frozen, remove the wrapping and bake directly from the freezer, adding about 15-20 minutes to the baking time.
Reheating
- For individual slices, microwave on low power until warmed through.
- For the whole pie, cover edges with foil and reheat in a preheated oven at 350°F for about 15-20 minutes.
FAQs
Here are some frequently asked questions about Ina Garten’s Perfect Peach Pie.
Can I use frozen peaches for Ina Garten’s Perfect Peach Pie?
Absolutely! If fresh peaches aren’t available, you can use frozen peaches. Just make sure to thaw and drain any excess liquid before using them in the recipe.
What makes Ina Garten’s Perfect Peach Pie so special?
Ina Garten’s Perfect Peach Pie features a delightful combination of ripe peaches, orange zest, and a flaky crust that truly elevates this classic dessert.
How do I know when my peach pie is done baking?
The pie is done when the crust is golden brown and you see bubbling juices around the lattice crust. If you find that the edges are browning too quickly, cover them with foil until it’s finished baking.
Can I change the fruit used in Ina Garten’s Perfect Peach Pie?
Certainly! This recipe is versatile; feel free to substitute other fruits like nectarines or blackberries if you’re looking for something different.
Final Thoughts
Baking Ina Garten’s Perfect Peach Pie is not just about creating a dessert; it’s an experience filled with warmth and joy. The sweet aroma of fresh peaches combined with a flaky crust will surely fill your home with love. I hope you enjoy every moment of making this pie as much as you’ll enjoy savoring each slice. Happy baking!
Ina Garten’s Perfect Peach Pie

If you’re in search of a delightful dessert that embodies the essence of summer, look no further than Ina Garten’s Perfect Peach Pie. This cherished recipe showcases succulent peaches enveloped in a flaky homemade crust, creating a treat that is both comforting and joyful. Ideal for any occasion, from casual weeknight dinners to festive family gatherings, this pie promises to bring smiles to all who enjoy it. With its bright flavors enhanced by orange juice and zest, the aroma wafting through your kitchen while it bakes will be nothing short of heavenly. Plus, making this pie is easier than you might think—perfect for bakers of all skill levels!
- Prep Time: 30 minutes
- Cook Time: 45 minutes
- Total Time: 1 hour 15 minutes
- Yield: Serves 8 slices 1x
- Category: Dessert
- Method: Baking
- Cuisine: American
Ingredients
- 2 1/2 lb. ripe peaches (6–7 large peaches, peeled)
- 1/2 C. sugar, plus extra for sprinkling on lattice
- 2 tbsp. cornstarch
- 1/2 tsp. grated orange zest
- 1/4 C. freshly squeezed orange juice
- 1 tbsp. unsalted butter
- 12 tbsp. very cold butter
- 3 C. all-purpose flour
- 1 tsp. kosher salt
- 1 tbsp. sugar
- 1/3 C. very cold vegetable shortening
- 1/2 C. ice water
Instructions
- Prepare the pie crust by mixing flour, salt, and sugar in a food processor. Add cold butter and shortening until pea-sized pieces form. Gradually add ice water until dough forms. Chill for 30 minutes.
- Roll out the chilled dough into two circles: one for the bottom crust and one for lattice strips.
- For the filling, combine sliced peaches with sugar, cornstarch, orange zest, juice, and butter over medium heat until bubbling. Mix in chopped peaches.
- Assemble by pouring the peach filling into the prepared bottom crust and weaving the lattice top.
- Brush with egg wash, sprinkle with sugar, then bake at 400°F for about 45 minutes or until golden brown.
Nutrition
- Serving Size: 1 slice (120g)
- Calories: 250
- Sugar: 18g
- Sodium: 160mg
- Fat: 12g
- Saturated Fat: 7g
- Unsaturated Fat: 4g
- Trans Fat: 0g
- Carbohydrates: 34g
- Fiber: 2g
- Protein: 3g
- Cholesterol: 25mg