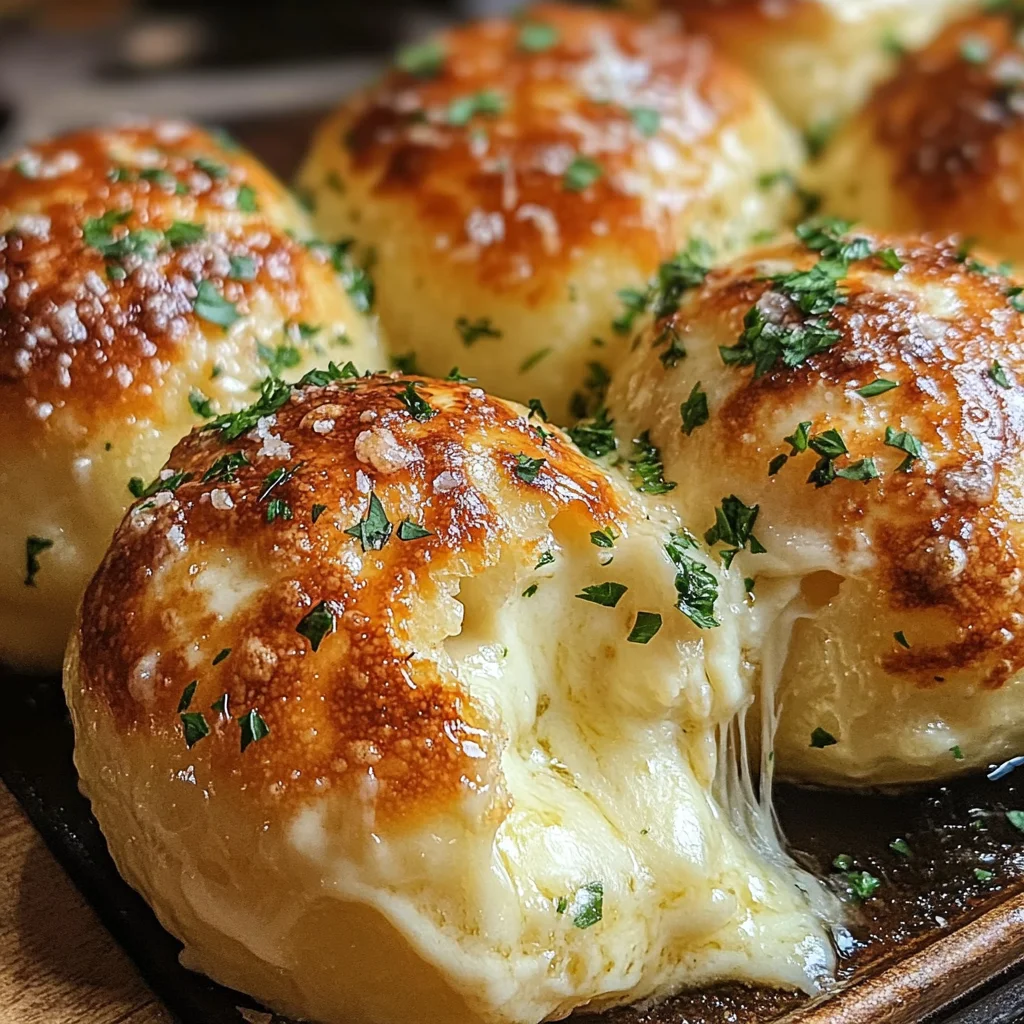
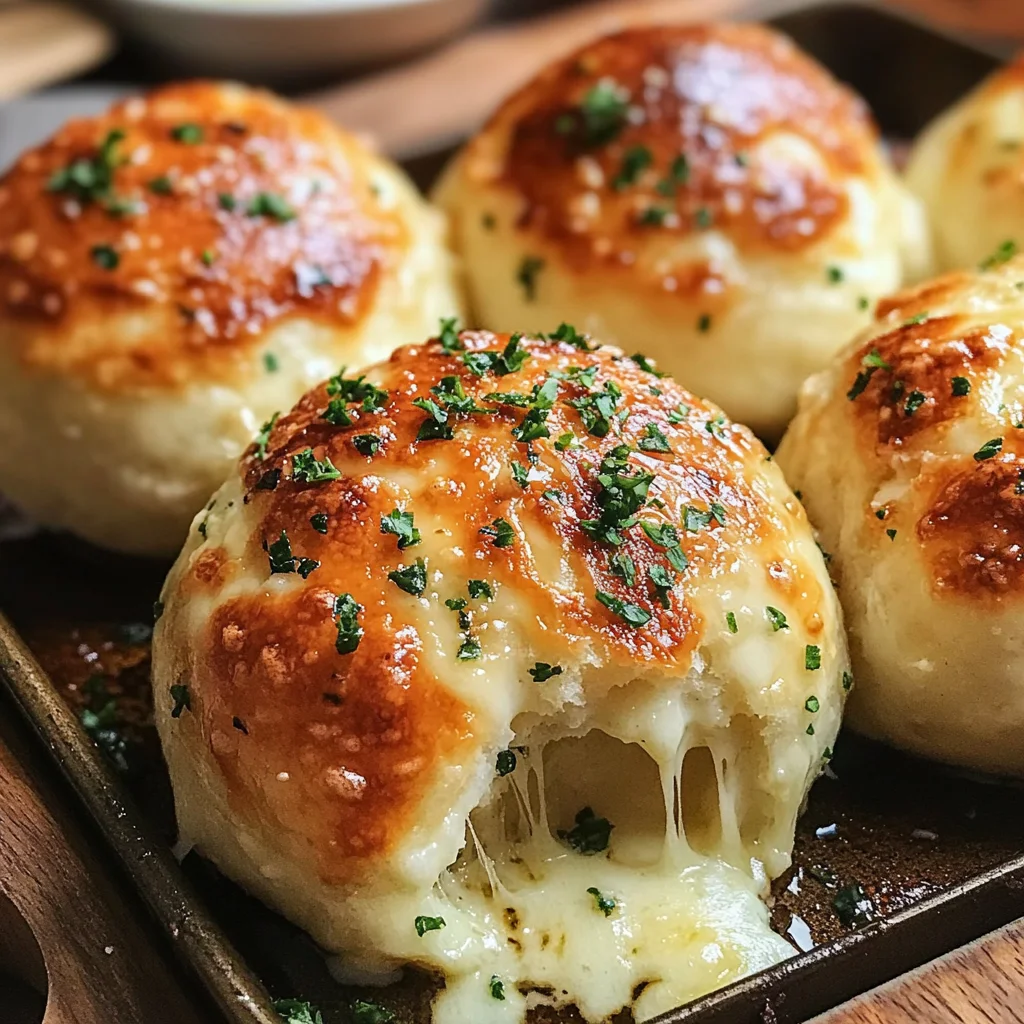
Buttery Garlic Cheese Bombs
If you’re looking for a cozy and delightful snack to brighten your day, you’ve come to the right place! Buttery Garlic Cheese Bombs are one of those recipes that feels like a warm hug. Imagine fluffy biscuit dough bursting with gooey cheese and infused with the irresistible aroma of garlic. It’s comfort food at its finest! Whether you’re whipping them up for a busy weeknight, serving them at a family gathering, or just treating yourself, these cheesy bites will surely steal the show.
What I love most about this recipe is how quick and easy it is to make. You can have these delicious Buttery Garlic Cheese Bombs ready in no time, making them perfect for unexpected guests or an impromptu movie night. Trust me, once you take that first bite, you’ll understand why this recipe has become a staple in my home!
Why You’ll Love This Recipe
- Quick and easy: These buttery delights come together in just a few simple steps, perfect for when you’re short on time.
- Family favorite: Kids and adults alike can’t resist the cheesy goodness packed inside each bomb!
- Versatile snack: Great as an appetizer, side dish, or even a fun party treat—these cheese bombs fit any occasion.
- Make ahead: You can prepare them in advance and bake them just before serving for fresh-out-of-the-oven goodness.
- Irresistible flavor: The combination of garlic and cheese creates a mouthwatering experience that will keep everyone coming back for more.
Ingredients You’ll Need
Gathering ingredients should feel fun and easy! For these Buttery Garlic Cheese Bombs, you’ll only need simple and wholesome items that you might already have in your kitchen. Let’s take a look at what you’ll need to whip up this cheesy delight:
- 1 can (8-count refrigerated biscuit dough)
- 8 small cubes of mozzarella or cheddar cheese
- 4 tablespoons unsalted butter (melted)
- 2 cloves garlic (minced (or 1/2 teaspoon garlic powder))
- 1 tablespoon fresh parsley (finely chopped (optional))
Variations
The beauty of Buttery Garlic Cheese Bombs lies in their flexibility! Feel free to get creative with your ingredients. Here are some fun ideas to mix things up:
- Swap the cheese: Use pepper jack for a spicy kick or gouda for a smoky flavor—your taste buds will thank you!
- Add herbs: Incorporate dried oregano or Italian seasoning into the garlic butter for an extra layer of flavor.
- Stuff with veggies: Add small pieces of cooked spinach or roasted red peppers along with the cheese for added nutrition.
- Make it sweet: Try using a chocolate square instead of cheese for a dessert version—just drizzle with melted chocolate after baking!
How to Make Buttery Garlic Cheese Bombs
Step 1: Preheat the Oven
First things first! Preheat your oven to 375°F (190°C) and line a baking sheet with parchment paper. This will keep your cheese bombs from sticking and make cleanup super easy.
Step 2: Prepare the Biscuits
Open that can of refrigerated biscuit dough—there’s something so satisfying about it! Gently separate each biscuit and flatten them slightly with your fingers. This creates a little disc that will hold all that cheesy goodness.
Step 3: Add the Cheese
Now comes the fun part! Place one cube of your favorite cheese in the center of each biscuit disc. Carefully fold over the dough and pinch the edges tightly to seal it completely. Rolling each filled biscuit into a smooth ball helps ensure they stay closed while baking.
Step 4: Arrange on the Baking Sheet
Place your beautiful cheese-filled balls seam-side down on the prepared baking sheet. Make sure there’s some space between them; they’ll puff up as they bake!
Step 5: Make the Garlic Butter
In a small bowl, combine melted butter with minced garlic (and parsley if you’re using it). This fragrant mixture is what makes these bombs truly special!
Step 6: Brush with Garlic Butter
Using a pastry brush, generously coat each cheese bomb with that delicious garlic butter mixture. Don’t be shy! Save some butter to brush on after they come out of the oven for an extra burst of flavor.
Step 7: Bake
Pop those beauties into the oven! Bake for about 10–12 minutes until they’re golden brown and puffed up. You want them crispy on the outside but gooey inside—perfection!
Step 8: Finish and Serve
Once baked, brush on any remaining garlic butter while they’re still warm. Serve immediately and watch as everyone dives into these delightful treats. Enjoy every cheesy, buttery bite!
Pro Tips for Making Buttery Garlic Cheese Bombs
Making these cheese bombs is easier than you think! Here are some tips to ensure they turn out perfectly every time.
-
Use Fresh Ingredients: Fresh garlic and parsley will provide a more vibrant flavor compared to dried versions, enhancing the overall taste of your cheese bombs.
-
Don’t Overfill: While it may be tempting to add more cheese, overfilling can cause the bombs to burst open during baking. Stick to one cube per biscuit for best results.
-
Check Doneness Carefully: Ovens can vary, so keep an eye on your cheese bombs as they bake. You want them golden brown but not overcooked. A good rule of thumb is to look for puffiness and a crisp exterior.
-
Experiment with Cheese: While mozzarella and cheddar are classic choices, feel free to try other cheeses like pepper jack for a spicy kick or gouda for a smokier flavor!
-
Make Ahead: You can prepare the cheese bombs in advance and refrigerate them before baking. This is perfect for parties or quick snacks when you’re short on time!
How to Serve Buttery Garlic Cheese Bombs
These Buttery Garlic Cheese Bombs are not just delicious; they also make a stunning presentation! Here are some ideas on how to serve them that will impress your guests or simply elevate your snack time.
Garnishes
-
Fresh Chopped Herbs: Top your cheese bombs with additional chopped parsley or even chives right before serving for a pop of color and freshness.
-
Grated Parmesan: A sprinkle of grated Parmesan adds an extra layer of cheesy goodness that complements the flavors beautifully.
Side Dishes
-
Marinara Sauce: A warm bowl of marinara sauce makes for a perfect dipping companion, enhancing the cheesy experience with its tangy flavor.
-
Garden Salad: A light garden salad with mixed greens, cherry tomatoes, and a simple vinaigrette provides a refreshing contrast to the richness of the cheese bombs.
-
Roasted Vegetables: Roasted veggies like bell peppers, zucchini, or broccoli bring healthy elements to your meal while their caramelized flavors pair wonderfully with the buttery bites.
-
Garlic Bread: For those who can’t get enough garlic, serve these cheese bombs alongside crispy garlic bread for an indulgent treat that’s sure to please!
Now that you have all these tips and serving suggestions at your fingertips, it’s time to gather your ingredients and whip up some Buttery Garlic Cheese Bombs. Enjoy every gooey bite!
Make Ahead and Storage
Buttery Garlic Cheese Bombs are perfect for meal prep! They can be made ahead of time, stored, and enjoyed later, making them a great snack or appetizer for busy days.
Storing Leftovers
- Place any leftover cheese bombs in an airtight container.
- Store them in the refrigerator for up to 3 days.
- Reheat gently in the oven or microwave before serving.
Freezing
- To freeze, place the uncooked cheese bombs on a baking sheet and freeze until solid.
- Transfer the frozen bombs to a freezer-safe bag or container.
- They can be stored in the freezer for up to 2 months.
Reheating
- For best results, reheat in the oven at 350°F (175°C) for about 5-7 minutes until warmed through.
- Alternatively, you can microwave them for about 30 seconds, but they may not retain their crispy texture as well.
FAQs
Here are some common questions about Buttery Garlic Cheese Bombs that you might have!
Can I use other types of cheese for Buttery Garlic Cheese Bombs?
Absolutely! Feel free to experiment with different cheeses like pepper jack for a spicy kick or gouda for a smoky flavor. Just ensure the cheese melts well.
How do I make Buttery Garlic Cheese Bombs vegan?
To make these cheese bombs vegan, use plant-based biscuit dough and dairy-free cheese alternatives. You can also substitute olive oil for butter and omit the garlic if desired.
Can I prepare Buttery Garlic Cheese Bombs in advance?
Yes! You can prepare them ahead of time by assembling and freezing them before baking. Just bake from frozen when you’re ready to enjoy!
Final Thoughts
I hope you enjoy making these Buttery Garlic Cheese Bombs as much as I do! They’re not just delicious; they’re also easy to whip up and perfect for sharing with family and friends. Don’t hesitate to try this recipe—it’s sure to bring smiles all around. Happy cooking!
Buttery Garlic Cheese Bombs

If you’re in search of a delightful snack that combines comfort and flavor, Buttery Garlic Cheese Bombs are your answer! These fluffy biscuit dough balls are filled with gooey cheese and infused with the rich aroma of garlic, making them an irresistible treat for any occasion. Whether it’s a busy weeknight or a festive gathering, these cheesy bites are sure to impress and satisfy every palate. The best part? They’re quick and easy to prepare, perfect for when unexpected guests drop by or when you’re craving something comforting. Enjoy them fresh out of the oven for a warm, cheesy experience that will have everyone coming back for more!
- Prep Time: 10 minutes
- Cook Time: 12 minutes
- Total Time: 22 minutes
- Yield: Makes about 8 servings 1x
- Category: Snack
- Method: Baking
- Cuisine: American
Ingredients
- 1 can (8-count) refrigerated biscuit dough
- 8 small cubes of mozzarella or cheddar cheese
- 4 tablespoons unsalted butter (melted)
- 2 cloves garlic (minced or 1/2 teaspoon garlic powder)
- 1 tablespoon fresh parsley (finely chopped, optional)
Instructions
- Preheat your oven to 375°F (190°C) and line a baking sheet with parchment paper.
- Separate each biscuit from the dough and flatten slightly to create discs.
- Place one cube of cheese in the center of each disc, fold over the dough, and pinch edges to seal completely.
- Arrange the filled biscuits seam-side down on the prepared baking sheet with space between them.
- Mix melted butter with minced garlic (and parsley if using) in a small bowl.
- Brush each cheese bomb generously with the garlic butter mixture.
- Bake for 10–12 minutes until golden brown and puffed up.
- Brush with any remaining garlic butter after baking and serve warm.
Nutrition
- Serving Size: 1 serving
- Calories: 140
- Sugar: 0g
- Sodium: 230mg
- Fat: 9g
- Saturated Fat: 5g
- Unsaturated Fat: 4g
- Trans Fat: 0g
- Carbohydrates: 11g
- Fiber: 0g
- Protein: 3g
- Cholesterol: 15mg