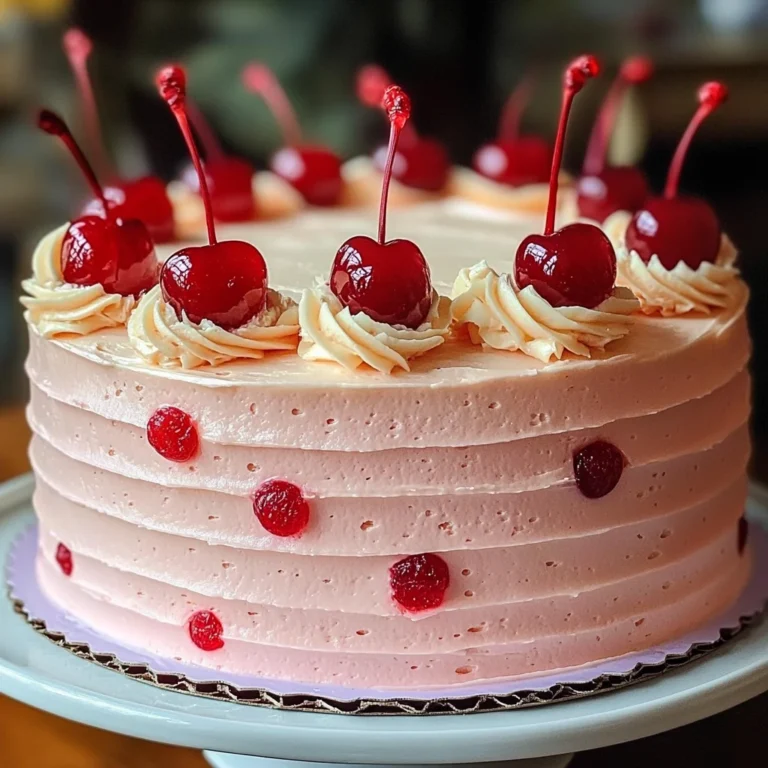
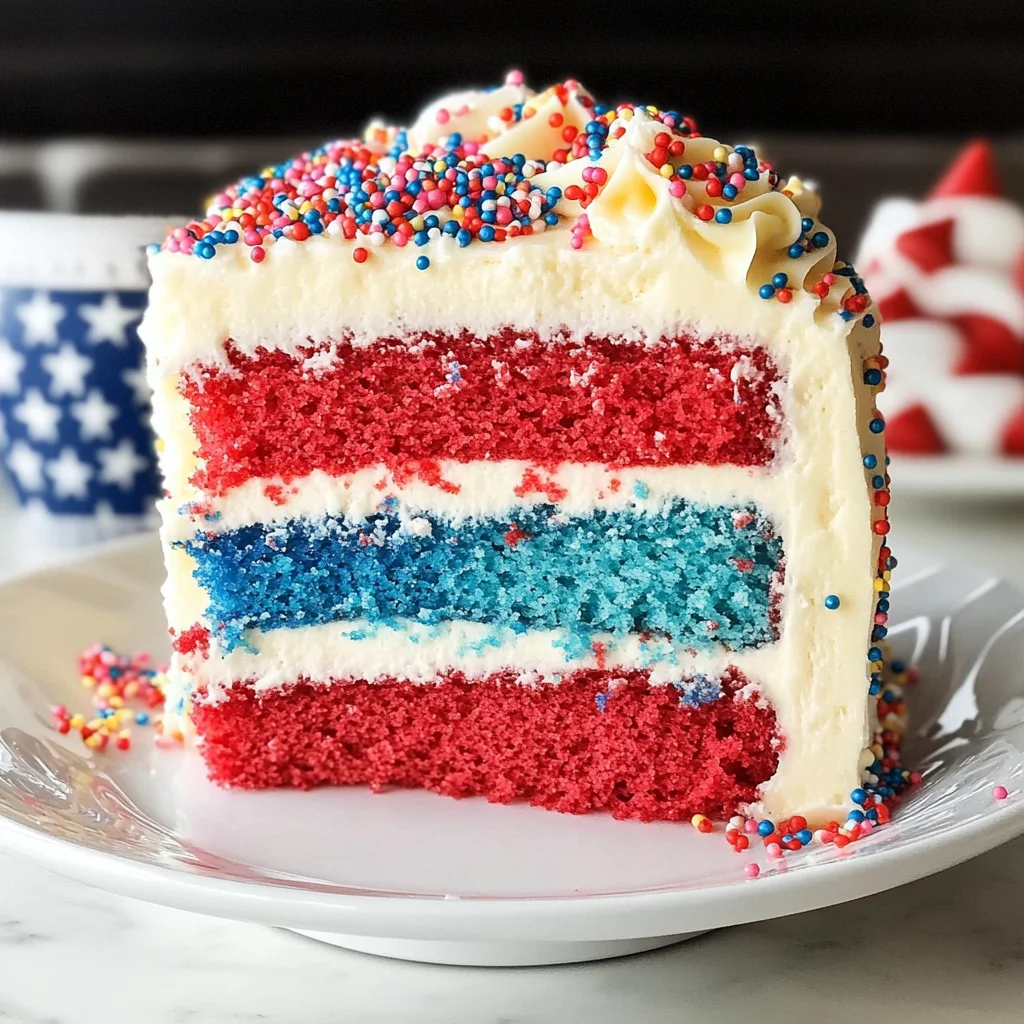
Red, White and Blue Cake
If you’re looking for a show-stopping dessert that adds a splash of color and joy to your celebrations, this Red, White and Blue Cake is just the ticket! It’s not only visually stunning with its layers of vibrant colors, but it also features a soft and fluffy vanilla cake that everyone will adore. This cake is perfect for any gathering, whether it’s a Memorial Day BBQ, a July 4th party, or even just a fun family get-together. Each bite brings a wave of nostalgia and sweetness that makes it truly special.
What I love most about this cake is how easy it is to make while still impressing your guests. You can whip up this delightful dessert with simple ingredients you likely already have in your pantry. Plus, it pairs beautifully with summer vibes and creates wonderful memories when shared with loved ones!
Why You’ll Love This Recipe
- Easy to Prepare: This recipe uses straightforward techniques that are super approachable for bakers of all skill levels.
- Family-Friendly Delight: Kids and adults alike will be reaching for seconds—it’s that good!
- Make-Ahead Magic: You can bake the cake layers in advance, making it easier to assemble on the day of your event.
- Customizable Fun: With colorful sprinkles and frosting options, you can easily personalize the cake for any occasion.
Ingredients You’ll Need
The ingredients for this Red, White and Blue Cake are as simple as they are wholesome. You’ll find everything you need right in your kitchen or at your local store. Let’s gather our supplies!
For the Cake
- 2 cups (380g) granulated sugar
- ½ cup (118 ml) vegetable oil
- 3 large eggs
- 1 tablespoon (15 ml) pure vanilla extract
- ½ cup (118 ml) sour cream
- 2 ½ cups (350 g) all-purpose flour
- 3 teaspoons (11.2 g) baking powder
- 1 teaspoon (5 g) salt
- 1 ¼ cups (296 ml) milk (I use nonfat)
- Gel colors – super red & royal blue
For the Frosting
- 2 ½ cups (576g) unsalted butter, cold
- 8 cups (1041g) powdered sugar
- 1 tablespoon (15ml) pure vanilla extract
- 2–3 tablespoons (30-44ml) heavy whipping cream (or milk)
- Pinch of salt
Variations
One of the best parts about this recipe is its flexibility! You can switch things up to suit your taste or dietary needs. Here are some fun ideas:
- Change Up the Colors: Use different gel colors to create unique themes for birthdays or holidays.
- Flavor Twist: Add almond extract instead of vanilla for a delightful flavor variation.
- Fruit Filling: Layer in fresh berries between the cake layers for an extra fruity touch.
- Gluten-Free Option: Substitute all-purpose flour with a gluten-free blend to cater to dietary preferences.
How to Make Red, White and Blue Cake
Step 1: Preheat Your Oven
Start by preheating your oven to 350°F (175°C). This step ensures that your cakes rise beautifully as soon as they hit the hot oven. It’s an important part of creating that soft texture we all love.
Step 2: Prepare Your Cake Pans
Grease your round cake pans with vegetable oil or line them with parchment paper. This will make it much easier to remove the cakes once they are baked without any sticking or tearing.
Step 3: Mix Wet Ingredients
In a large mixing bowl, combine the granulated sugar and vegetable oil. Beat in large eggs one at a time until well incorporated. Stir in pure vanilla extract and sour cream until smooth. This mixture is where all those rich flavors begin!
Step 4: Combine Dry Ingredients
In another bowl, whisk together all-purpose flour, baking powder, and salt. Gradually add this dry mixture into your wet ingredients while alternating with milk until just combined. Be careful not to overmix; we want our cake light and airy.
Step 5: Add Color
Now comes the fun part! Divide the batter evenly into three bowls. Add super red gel color to one bowl and royal blue gel color to another until you reach desired shades. Leave one bowl plain white—this will give us our patriotic layers!
Step 6: Bake Your Cakes
Pour each colored batter into its own prepared pan. Bake for about 20 minutes or until a toothpick comes out clean from the center. Let them cool completely before frosting—this helps prevent melting!
Step 7: Make the Buttercream Frosting
While waiting for the cakes to cool, beat cold unsalted butter until creamy. Gradually add powdered sugar, followed by vanilla extract and heavy whipping cream until you achieve fluffy frosting perfection!
Step 8: Assemble Your Cake
Once cooled, layer your red, white, and blue cakes on a serving plate with layers of buttercream between them. Spread frosting generously around the sides and top of the entire cake for that beautiful finish.
Step 9: Decorate!
Finish off with festive sprinkles—feel free to go wild here! The more colorful, the better!
And there you have it! A stunning Red, White and Blue Cake that’s sure to be the star of your next celebration! Enjoy every slice!
Pro Tips for Making Red, White and Blue Cake
Baking a beautiful and delicious Red, White and Blue Cake is a delightful experience, and these pro tips will help you achieve the best results!
-
Use Room Temperature Ingredients: Bringing your eggs, sour cream, and milk to room temperature before mixing ensures a smoother batter and better rise during baking.
-
Divide Batter Evenly: When coloring your cake layers, use a kitchen scale or measuring cups to divide the batter evenly. This ensures that each layer bakes uniformly for a balanced cake.
-
Cool Layers Completely: Allow your cake layers to cool completely before frosting them. If they’re still warm, the buttercream will melt, resulting in a messy presentation.
-
Crumb Coat First: Apply a thin layer of frosting (crumb coat) to seal in any loose crumbs before adding your final layer of buttercream. This helps create a smooth and professional finish.
-
Chill Before Slicing: After decorating, let your cake chill in the refrigerator for about 30 minutes. This makes it easier to slice and helps keep the layers intact.
How to Serve Red, White and Blue Cake
This vibrant cake is not only tasty but also visually stunning! Here are some ideas on how to present it beautifully at your next gathering.
Garnishes
- Fresh Berries: Top your cake with fresh strawberries, blueberries, or raspberries for a pop of color and added freshness.
- Whipped Cream: A dollop of whipped cream can add richness while enhancing the vanilla flavor of your cake.
- Mint Leaves: Add a few sprigs of fresh mint on top for an aromatic touch that also adds a lovely contrast to the colors of the cake.
Side Dishes
- Fruit Salad: A refreshing mix of seasonal fruits complements the sweetness of the cake while adding a lightness to the meal.
- Ice Cream: Serve slices of the cake with scoops of vanilla or berry-flavored ice cream for a classic dessert pairing that everyone loves.
- Grilled Veggies: For a savory side dish option, grilled vegetables like zucchini, bell peppers, and asparagus provide a colorful contrast and balance out the sweetness of the cake.
- Potato Salad: A creamy potato salad can be an excellent side for BBQs; its rich flavors work wonderfully alongside this festive dessert.
With these serving suggestions and tips for creating your Red, White and Blue Cake, you’re sure to impress family and friends at any celebration! Enjoy baking and indulging in this delightful treat!

Make Ahead and Storage
This Red, White and Blue Cake is perfect for meal prep, making it a fantastic option for your gatherings. You can make it ahead of time and store it properly to keep it fresh and delicious for your celebrations!
Storing Leftovers
- Allow the cake to cool completely before storing.
- Wrap individual slices in plastic wrap or foil to maintain freshness.
- Store in an airtight container at room temperature for up to 3 days or in the refrigerator for up to a week.
Freezing
- To freeze the cake, wrap it tightly in plastic wrap followed by aluminum foil to prevent freezer burn.
- The cake can be frozen for up to 3 months.
- Thaw the cake overnight in the refrigerator before serving.
Reheating
- If you prefer your cake warm, gently reheat slices in the microwave for about 10-15 seconds.
- Alternatively, place slices in a preheated oven at 300°F (150°C) for about 5-10 minutes until warmed through.
FAQs
If you have questions about this delightful dessert, you’re not alone! Here are some common inquiries that might help.
Can I use different colors for the Red, White and Blue Cake?
Absolutely! You can use any gel colors of your choice to create a fun and vibrant cake. Just ensure they are food-safe and suitable for baking.
How should I decorate my Red, White and Blue Cake?
You can get creative with toppings! Fresh berries like strawberries and blueberries work beautifully alongside sprinkles. Whipped cream is also a great addition if you’re looking for extra flair.
Can I make the Red, White and Blue Cake gluten-free?
Yes! Substitute all-purpose flour with a gluten-free flour blend. Make sure that all other ingredients are also gluten-free.
Final Thoughts
I hope you find joy in making this Red, White and Blue Cake as much as I do! It’s not just a delicious treat but also a beautiful centerpiece for any festive occasion. Remember, there’s nothing quite like sharing homemade desserts with loved ones. Happy baking, and enjoy every slice of this patriotic delight!
Red, White and Blue Cake
If you’re searching for a stunning dessert that brings color and joy to your celebrations, look no further than this delightful Red, White and Blue Cake. This eye-catching layered cake features soft and fluffy vanilla layers, perfect for any gathering—from Memorial Day BBQs to family reunions. Each slice is a nostalgic reminder of summer festivities, making it the ideal centerpiece for your next event. With straightforward techniques and easily accessible ingredients, this cake is not only a treat to the eyes but also a breeze to create. Elevate your celebration and impress your guests with this vibrant dessert that promises sweet memories!
- Prep Time: 30 minutes
- Cook Time: 20 minutes
- Total Time: 50 minutes
- Yield: Approx. 12 servings
- Category: Dessert
- Method: Baking
- Cuisine: American
Ingredients
- 2 cups granulated sugar
- ½ cup vegetable oil
- 3 large eggs
- 1 tablespoon pure vanilla extract
- ½ cup sour cream
- 2 ½ cups all-purpose flour
- 3 teaspoons baking powder
- 1 teaspoon salt
- 1 ¼ cups milk (nonfat)
- Gel colors: super red & royal blue
Instructions
- Preheat oven to 350°F (175°C) and grease round cake pans.
- In a large bowl, mix sugar and vegetable oil; beat in eggs one at a time. Stir in vanilla extract and sour cream until smooth.
- In another bowl, whisk flour, baking powder, and salt. Gradually add dry ingredients alternately with milk to the wet mixture.
- Divide the batter into three bowls; color one red, one blue, and leave one plain.
- Pour each batter into prepared pans and bake for about 20 minutes or until a toothpick comes out clean.
- Cool completely before frosting with buttercream made by beating cold unsalted butter with powdered sugar, vanilla extract, and cream.
Nutrition
- Serving Size: 1 slice (120g)
- Calories: 420
- Sugar: 45g
- Sodium: 220mg
- Fat: 18g
- Saturated Fat: 10g
- Unsaturated Fat: 8g
- Trans Fat: 0g
- Carbohydrates: 60g
- Fiber: <1g
- Protein: 4g
- Cholesterol: 80mg